How to Fix Overexposed Photos: Recover Blown-Out Detail
Learn how to fix overexposed photos and recover blown-out detail. What AI can rebalance, what clipped highlights it can't, and a step-by-step free fix.
You finally got the family on the beach at the same time, the shot looked fine on the tiny screen, and now on a real monitor the sky is a flat white sheet and everyone's faces glow like they're lit from inside. The photo is overexposed. The question is how much of it you can get back.
Overexposure is the most common reason a once-in-a-lifetime shot ends up unusable. A backlit portrait, a snowy slope, a wedding under harsh noon sun, a window behind the subject — any of these can fool a camera into dumping too much light onto the sensor. The bright areas blow out to white, color goes pale and milky, and the whole frame looks washed out. You can't reshoot a moment that already happened, so the only path is recovery.
Quick answer: To fix an overexposed photo, pull the highlights and whites down, rebuild contrast, and restore the color the brightness washed out. The fastest way is to upload it to AI photo enhancement, which tone-maps the image automatically. One honest caveat: anything that recorded as pure white has no detail left to recover — AI can only repaint a plausible guess there.
What "Overexposed" Actually Means
Every pixel in a digital photo stores a brightness value. In a standard 8-bit image, that value runs from 0 (pure black) to 255 (pure white) for each color channel. Overexposure happens when too much light pushes large parts of the frame toward that 255 ceiling. Once a pixel hits the ceiling, it stops recording differences — bright cloud and brighter cloud both become the same flat 255.
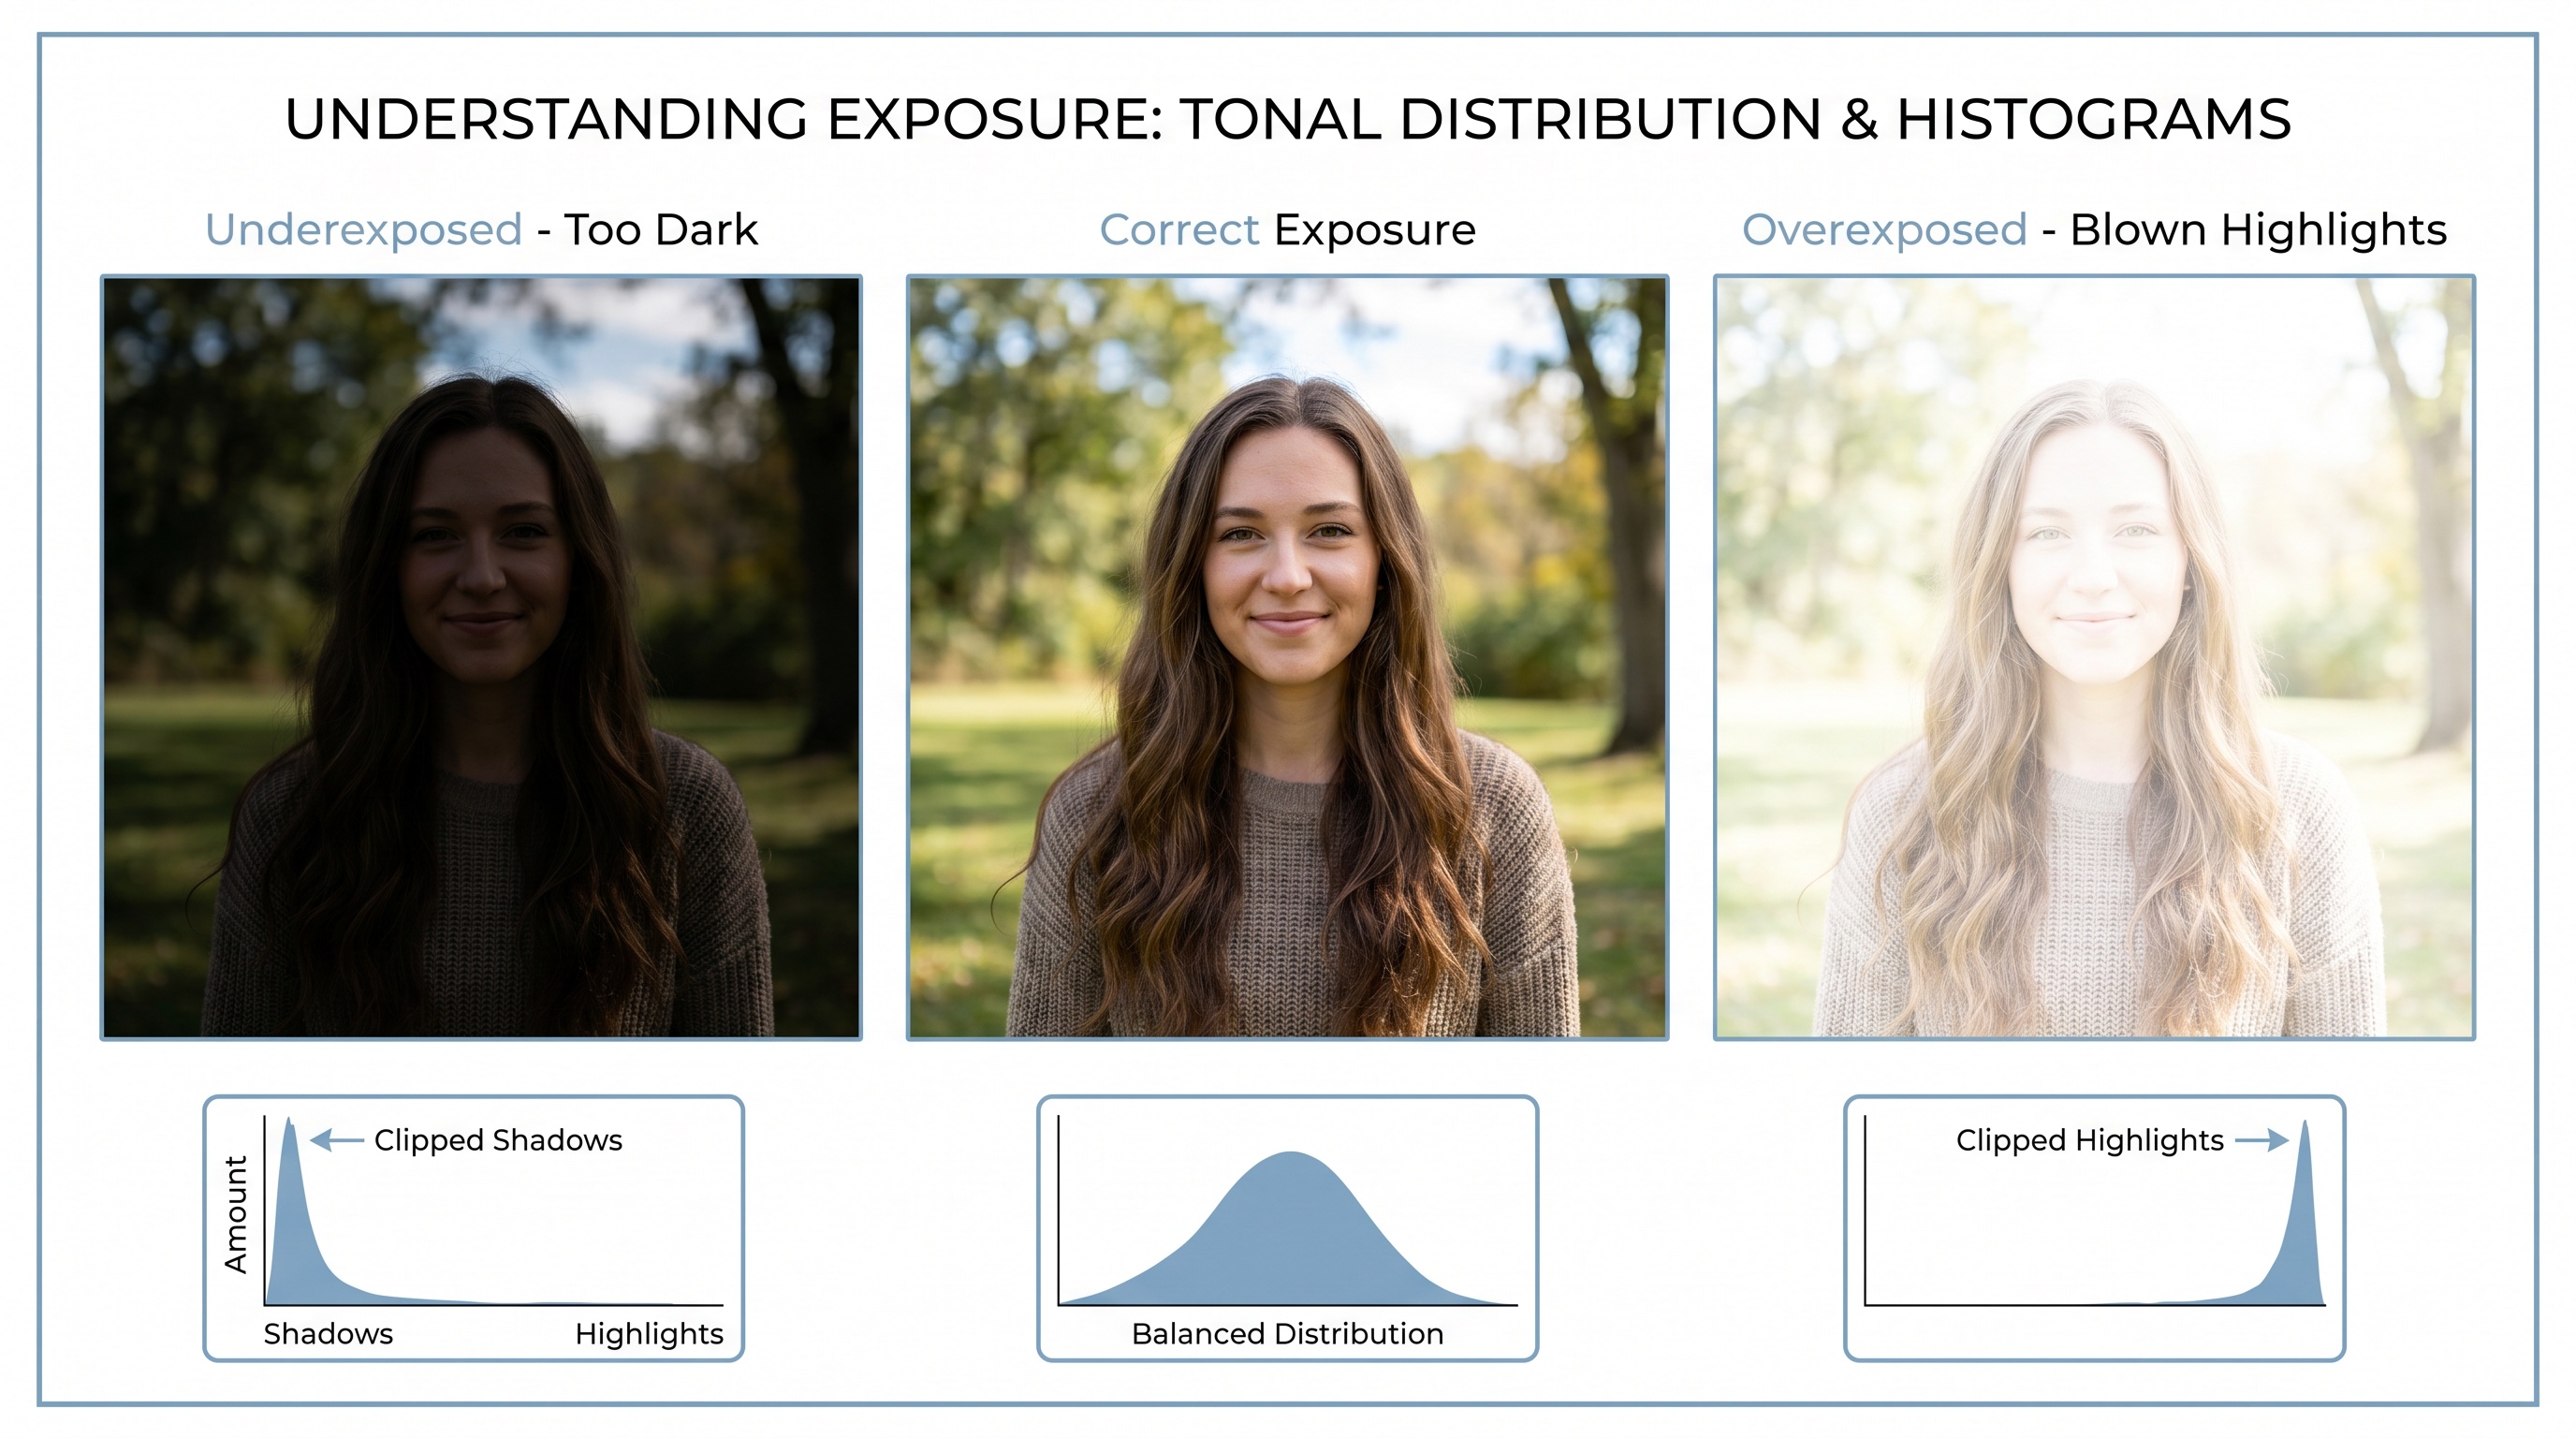
That ceiling effect is why overexposure produces three distinct symptoms, and it helps to name them, because each one recovers differently:
- Clipped (blown-out) highlights. The brightest areas recorded as solid white with zero texture. A sky with no clouds, a shirt with no folds, a forehead with no skin. This is the hard limit of what any fix can do.
- Washed-out color. Strong light desaturates everything it touches, so reds go pink, greens go pale, skin goes chalky. The color data is usually still there, just stretched thin. This recovers well.
- Lost contrast. The whole image looks flat and milky because the tonal range got squeezed into the top end. Pulling that range back open restores depth almost completely.
Why phones overexpose so often
Phone cameras meter the average brightness of the whole scene and try to make it look "correct." Point one at a backlit subject and the camera sees a lot of dark foreground, so it lifts the exposure to compensate — and blows out the bright background in the process. Snow, beaches, white walls, and bright overcast skies trick the meter the same way. The phone is doing exactly what it was told to do; the scene just isn't the average it assumed.
What's Recoverable and What Isn't
This is the part most "fix your photos" articles skip, and it's the part that saves you from wasted effort. Recovery depends entirely on whether the data still exists in the file.
Usually recoverable
- • Washed-out, pale color across the frame
- • Flat, low-contrast "milky" images
- • Partially bright skin and faces that still show texture
- • Skies that are bright but still hold faint cloud detail
- • Slightly overexposed RAW files (lots of latitude)
Not truly recoverable
- • Pure-white areas with zero texture (fully clipped)
- • A face where every highlight detail is gone
- • A sky that's 100% flat white edge to edge
- • Heavily compressed JPEGs of blown-out scenes
- • Anything where all three color channels hit 255
The honest line is this: if a region recorded as pure white, the detail that was there is physically not in the file anymore. No tool, AI or otherwise, can read data that was never recorded. What good AI does in those spots is reconstruct something believable based on the surrounding pixels — a face gets plausible skin, a sky gets a plausible gradient — but it's an educated invention, not a recovery. For everything short of full clipping, though, recovery is genuinely good.
How AI Recovers an Overexposed Photo
Manually, fixing an overexposed photo means dragging highlight, white, contrast, and saturation sliders until it looks right — and it takes a trained eye to avoid a gray, lifeless result. AI tone-mapping does the same job by analyzing the image as a whole instead of treating every pixel in isolation.
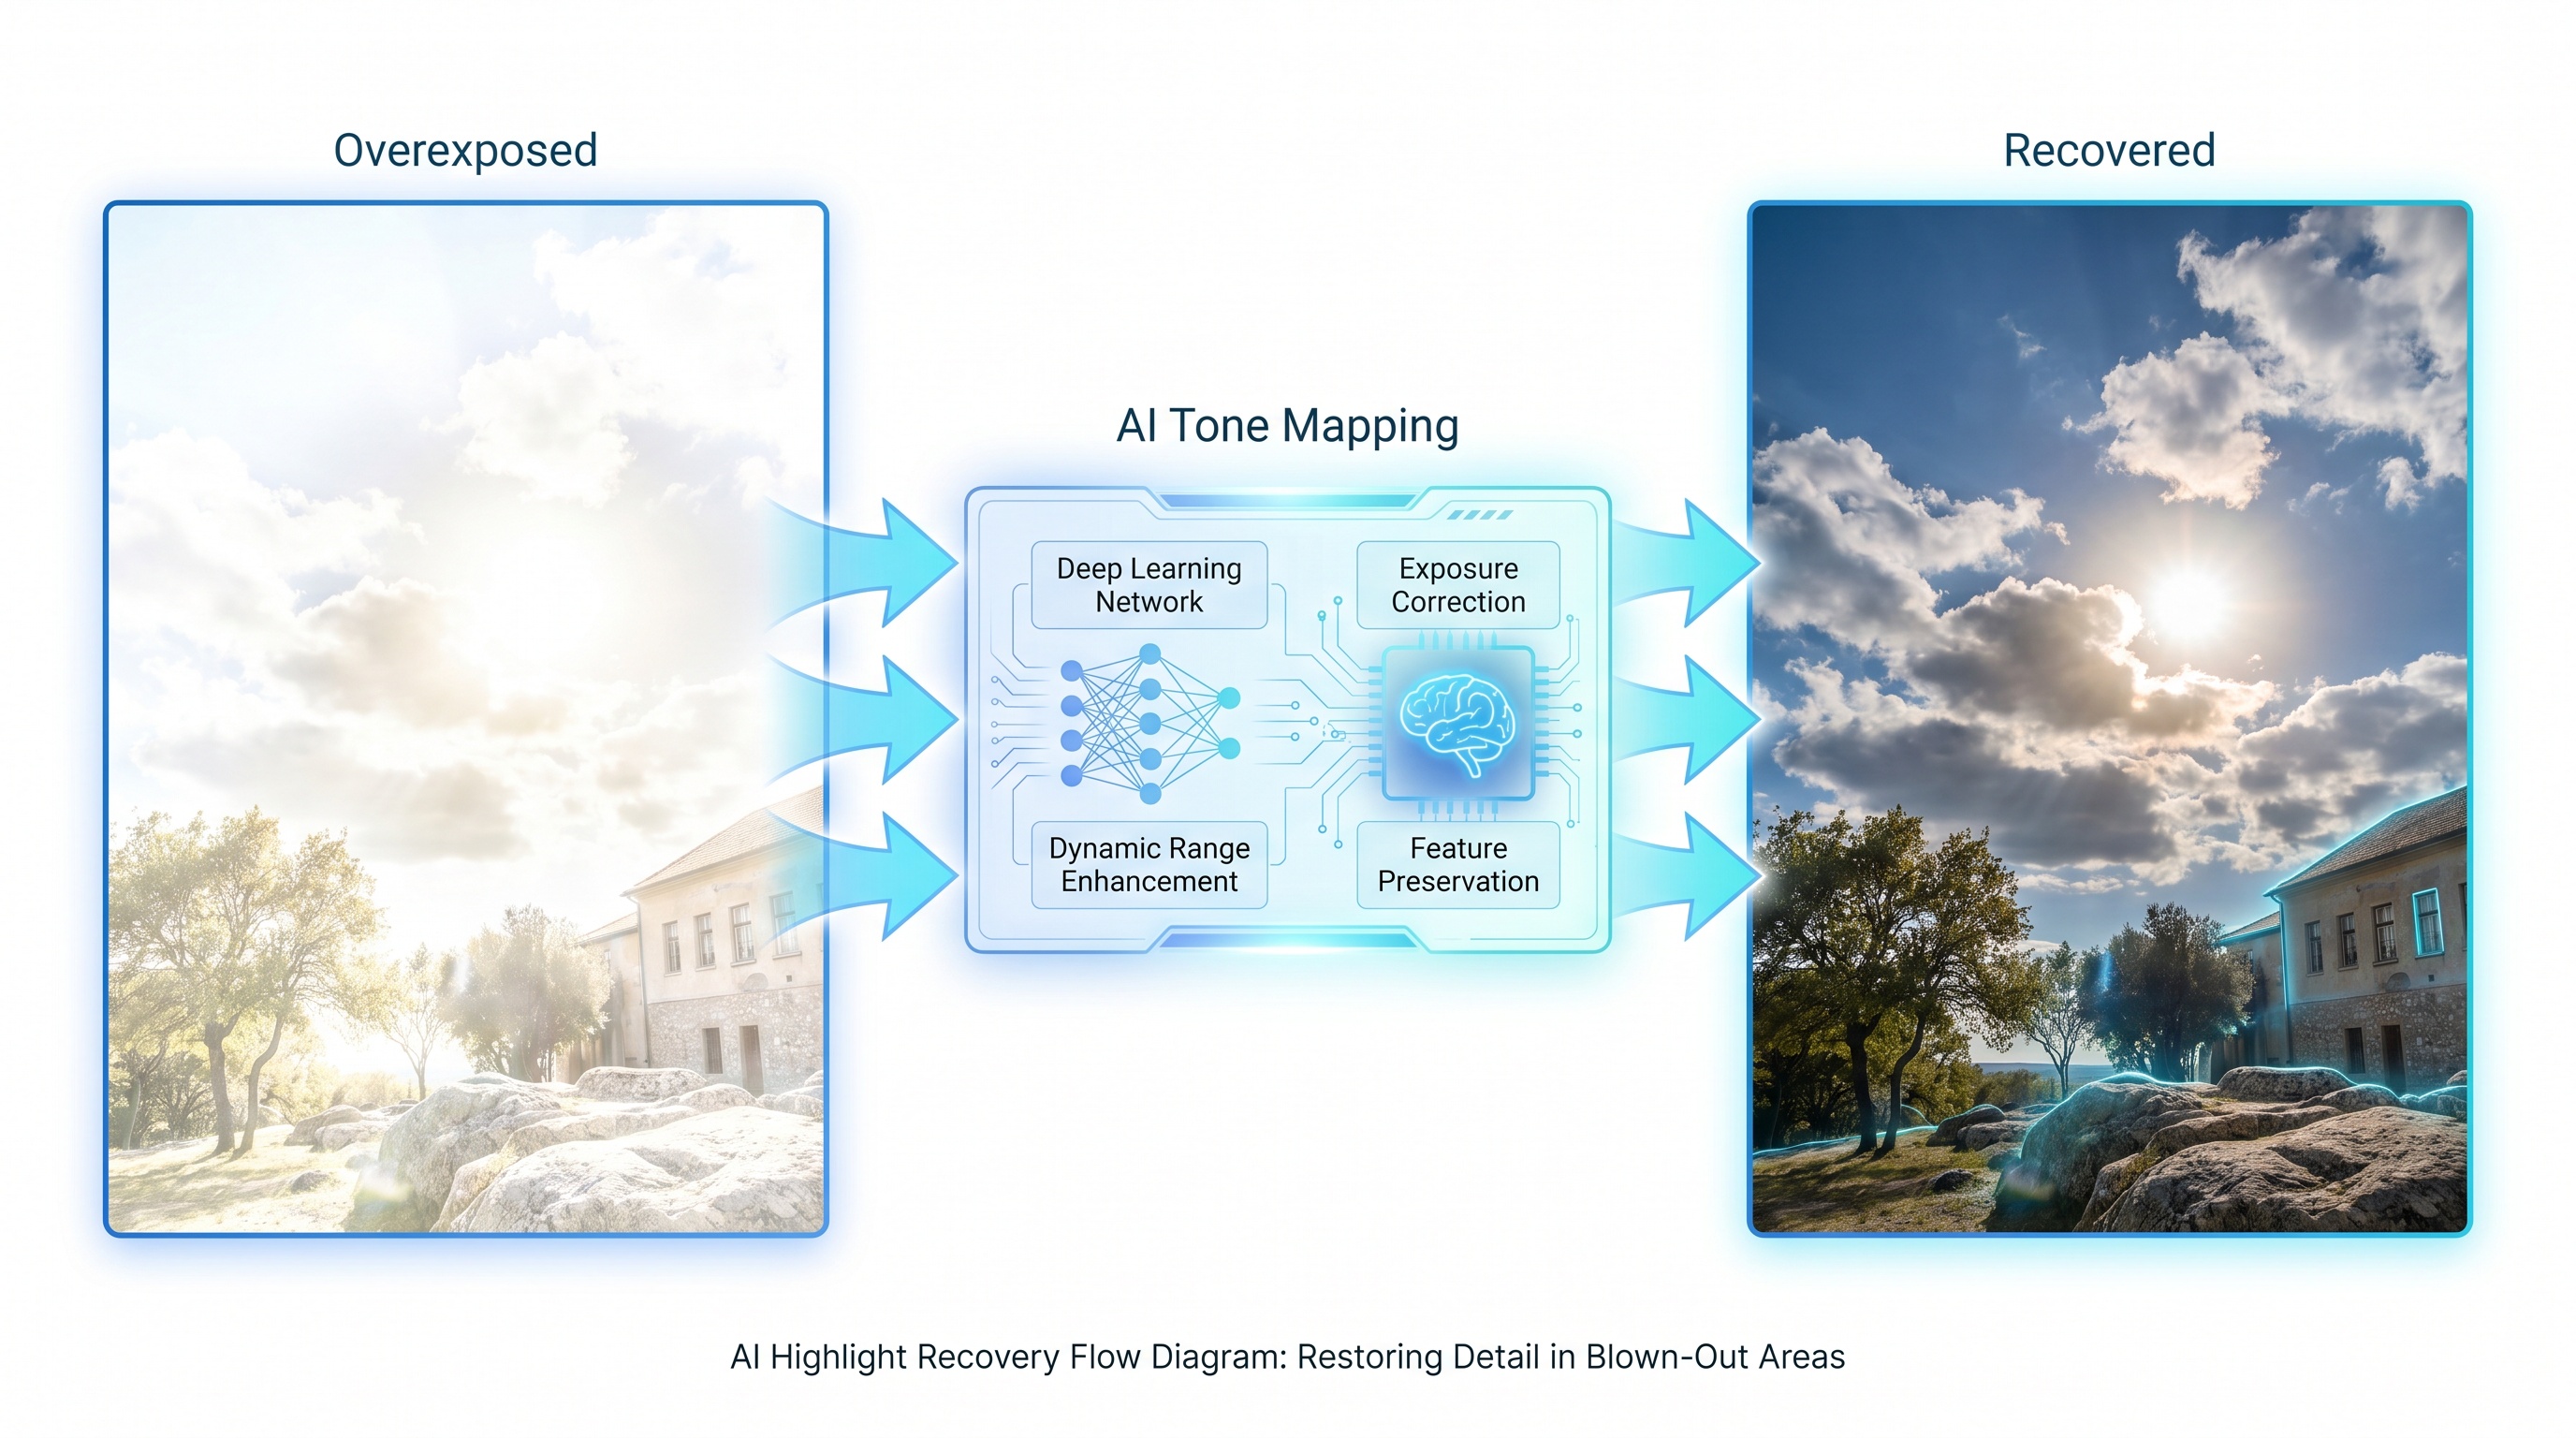
A restoration model has seen millions of correctly exposed photos, so it knows what a normal sky, a normal complexion, and normal grass are supposed to look like. When it meets a washed-out frame, it does three things at once: it compresses the over-bright tones back into a natural range, it rebuilds the contrast that flattening destroyed, and it restores the color saturation the light bleached out. For partially clipped highlights — the bright-but-not-blank kind — it infers the missing texture from the surrounding pixels, which is why faces and skies come back looking believable rather than smeared.
The advantage over manual editing is speed and consistency. You don't need to know where the highlight slider lives or how far to push it. If you want the full picture of what these models do under the hood, we broke it down in how AI photo restoration works.
How to Fix an Overexposed Photo (Step by Step)
The fast route: AI enhancement
- Step 1: Start from the best version of the file. If you have the original RAW or the full-resolution JPEG, use it. A screenshot or a re-saved social media copy has already thrown away data you'll want.
- Step 2: Upload it to the enhancer. Open the free restore and enhance tool and drop the photo in. No sign-up to try it.
- Step 3: Let the model tone-map it. The AI pulls the highlights down, reopens the contrast, and restores washed-out color automatically. This takes a few seconds.
- Step 4: Compare and run a second pass if needed. Results vary slightly between runs. If a face or sky looks over-corrected, run it again and keep the version that looks most natural.
- Step 5: Download the full-resolution result. Save the fixed image and, if it matters, keep the original too — you may want to try a different crop later.
If you'd rather correct it by hand in Lightroom or a similar editor, the order is: drop Highlights and Whites first, then add Contrast and a touch of Blacks to put depth back, then nudge Vibrance to undo the color washout. Edit a RAW file if you have one — the recoverable headroom is far larger than a JPEG's.
Got a Washed-Out Shot?
Upload it and the AI rebalances the highlights in about 30 seconds.
Who Needs This Most
Families and travelers
- • Beach and snow trips where everything blew out
- • Backlit group photos against bright skies
- • Old prints that have faded pale over decades
Sellers and creators
- • Product shots overexposed by a ring light or window
- • Real estate interiors blown out by bright windows
- • Profile pictures washed out by harsh sun
Event shooters
- • Wedding dresses turned to featureless white
- • Outdoor ceremonies under noon sun
- • Stage and concert shots with hot spotlights
Everyday phone users
- • Auto-exposure that lifted brightness too far
- • Screenshots that came out pale and flat
- • Photos of bright screens and white walls
Before and After
 Before
 After
AfterBacklit beach portrait
Highlights pulled back and skin tones restored from a washed-out backlit shot.
 Before
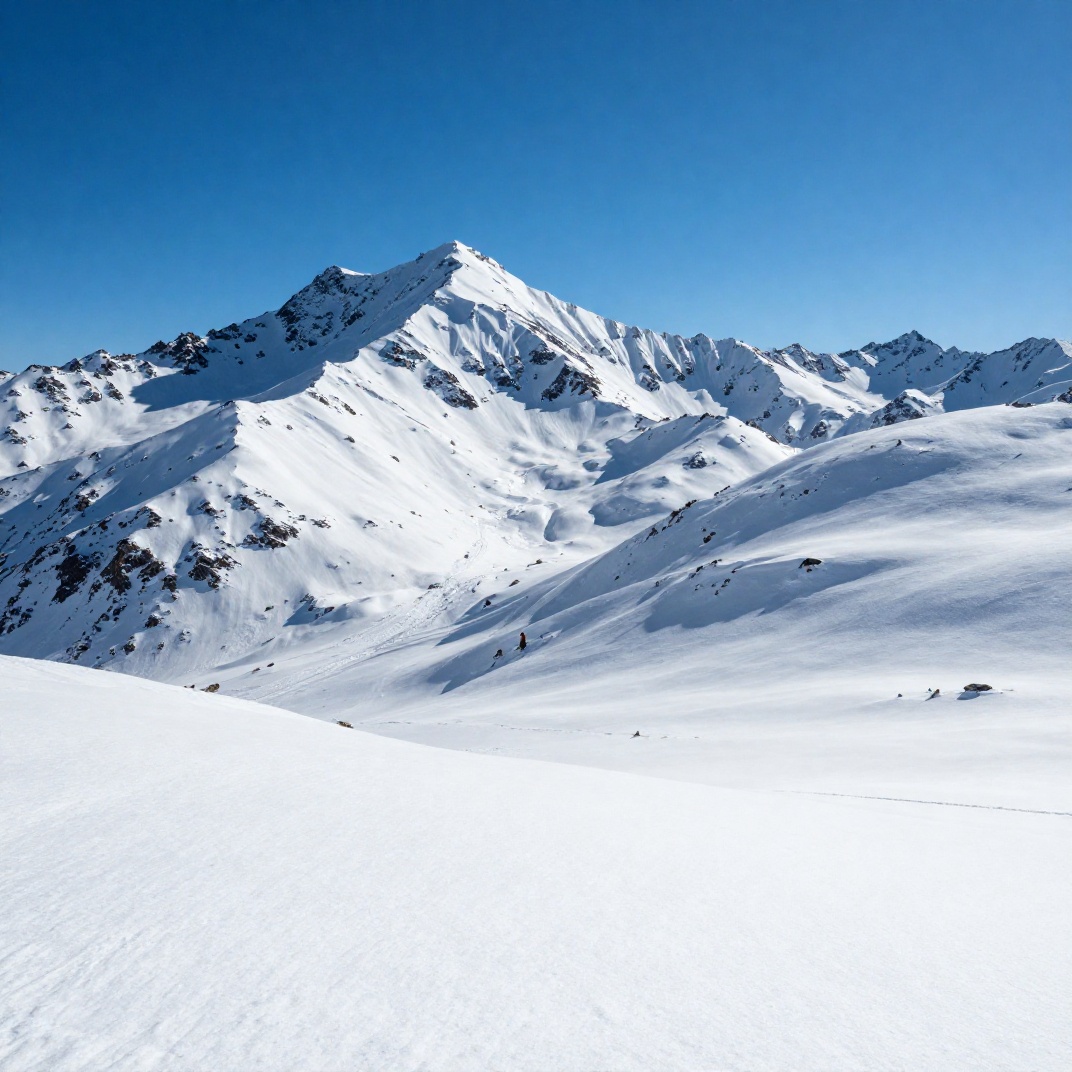 After
AfterSnowy mountain scene
Snow texture and sky color recovered from a bright, flat winter landscape.
 Before
 After
AfterRing-light product shot
Detail and true color brought back from a too-bright catalog image.
 Before
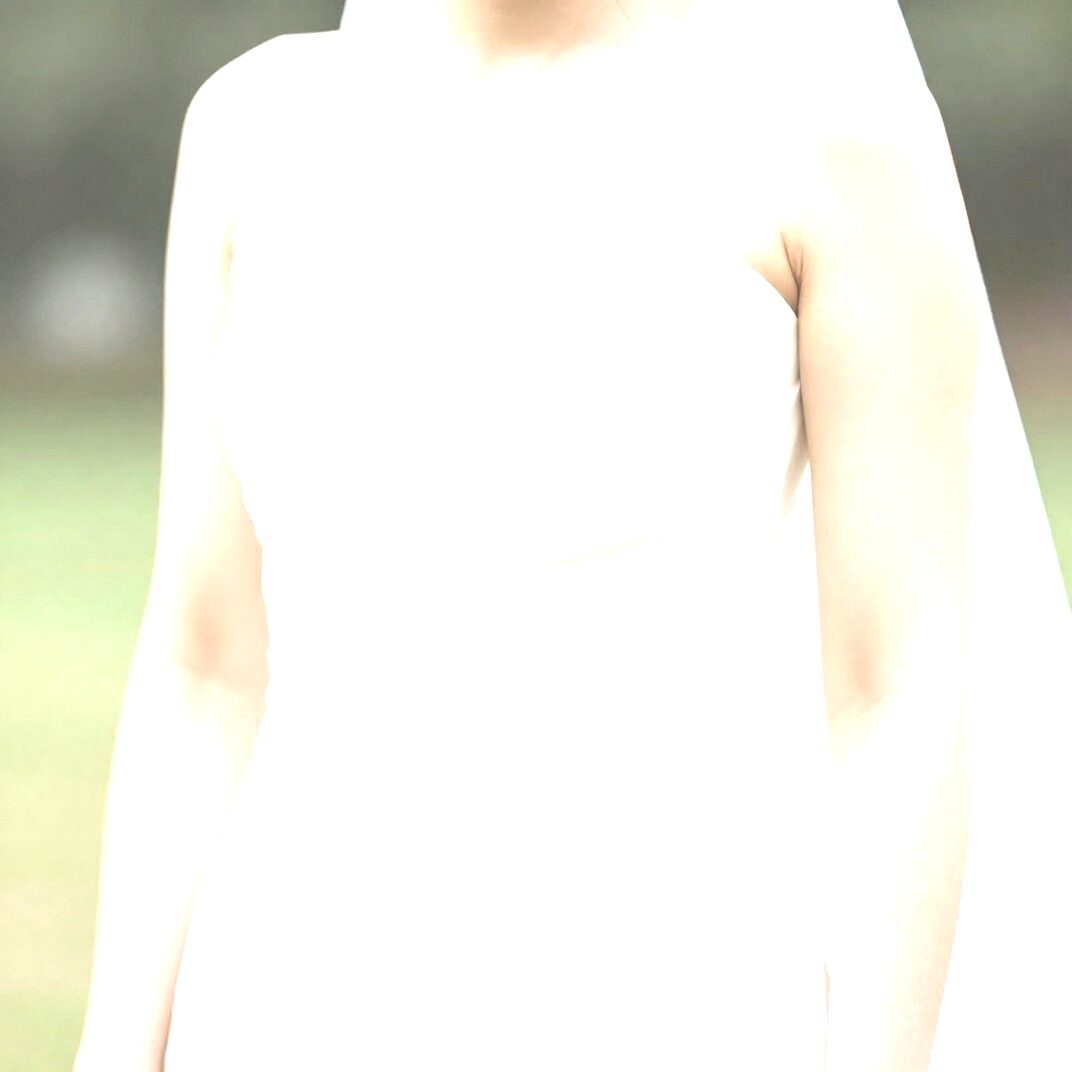
 After
AfterWedding dress detail
Fabric texture rebuilt in a dress that had blown out to plain white.
Pro tips to stop overexposing in the first place
- • Shoot RAW when you can. RAW keeps far more highlight headroom than JPEG, so even a too-bright frame often has recoverable detail.
- • Expose for the highlights. It's easier to lift a slightly dark photo than to rescue a blown-out one. When in doubt, err darker.
- • Tap to meter on your phone. Tap the brightest part of the scene, then drag the exposure slider down a notch before you shoot.
- • Watch the histogram. If it's jammed against the right wall, you're clipping highlights. Reduce exposure until it pulls off the edge.
- • Turn on highlight clipping warnings. Most cameras and many phone apps can blink the blown-out areas so you catch them before the moment passes.
That blown-out shot might not be lost.
Upload the photo and let the AI pull the highlights back, rebuild contrast, and restore the color the light washed out. Free, no sign-up, results in about 30 seconds.
Frequently asked questions
Can you really fix an overexposed photo?
Often, yes. If the bright areas still hold some color and texture, an editor or AI tool can pull the brightness back, restore contrast, and recover detail in the highlights. The limit is hard clipping: any area that recorded as pure white has no data left to recover, and the best a tool can do is paint in something plausible.
What does it mean when a photo is blown out?
Blown out means the brightest parts of the image were so overexposed that the camera recorded them as flat white with no detail. A blown-out sky has no clouds; a blown-out face has no skin texture. It happens when too much light hits the sensor and pushes those pixels to their maximum value.
How do I recover highlights in an overexposed photo?
Lower the highlights and whites, then add back the contrast and color saturation the overexposure washed out. RAW files have extra latitude to pull detail back. For JPEGs, an AI tone-mapping tool does this automatically by analyzing the surrounding pixels and rebuilding a realistic brightness range.
Why do my phone photos look washed out?
Phone cameras meter for the whole scene and tend to lift exposure in tricky light. Shooting toward the sun, a bright window, or snow fools the meter into overexposing, which leaves washed-out color and flat, milky highlights. Tapping the bright area to meter on it prevents most of it.
Is it better to fix a RAW file or a JPEG?
RAW, by a wide margin. A RAW file keeps far more tonal information than what you see on screen, so highlights that look white may still hold recoverable data. A JPEG bakes in the exposure and discards that latitude, which is why an AI tool that reconstructs detail is usually the better option for JPEGs.
Ready to Transform Your Photos?
Join thousands of users creating amazing AI-generated photos with BestPhoto