How to Fix Grainy Photos: Remove Noise Free with AI
Grainy, noisy photos come from high ISO, low light, and old scans. Here's why it happens and how to remove grain from photos free with AI in about 30 seconds.

You finally got the shot — your kid blowing out the candles, the band mid-song, the city skyline at dusk. Then you open it on a real screen and it's crawling with speckles. The moment was sharp. The photo looks like static.
Grain ruins photos you can't reshoot. The candles are already out, the concert is over, grandpa isn't getting any younger. And the usual fixes don't help much: Photoshop's noise slider turns faces into wax, phone "enhance" buttons barely move the needle, and most online tools either watermark the result or hide it behind a paywall. Meanwhile the photo just sits there, grainy, in a folder you keep meaning to deal with.
Quick answer: Grain is sensor noise from shooting in low light at high ISO (or from old film scans). To fix grainy photos, upload them to an AI denoiser that separates real detail from random speckle and rebuilds clean tones. It takes about 30 seconds, keeps edges sharp, and is free.
Why Are My Photos Grainy in the First Place?
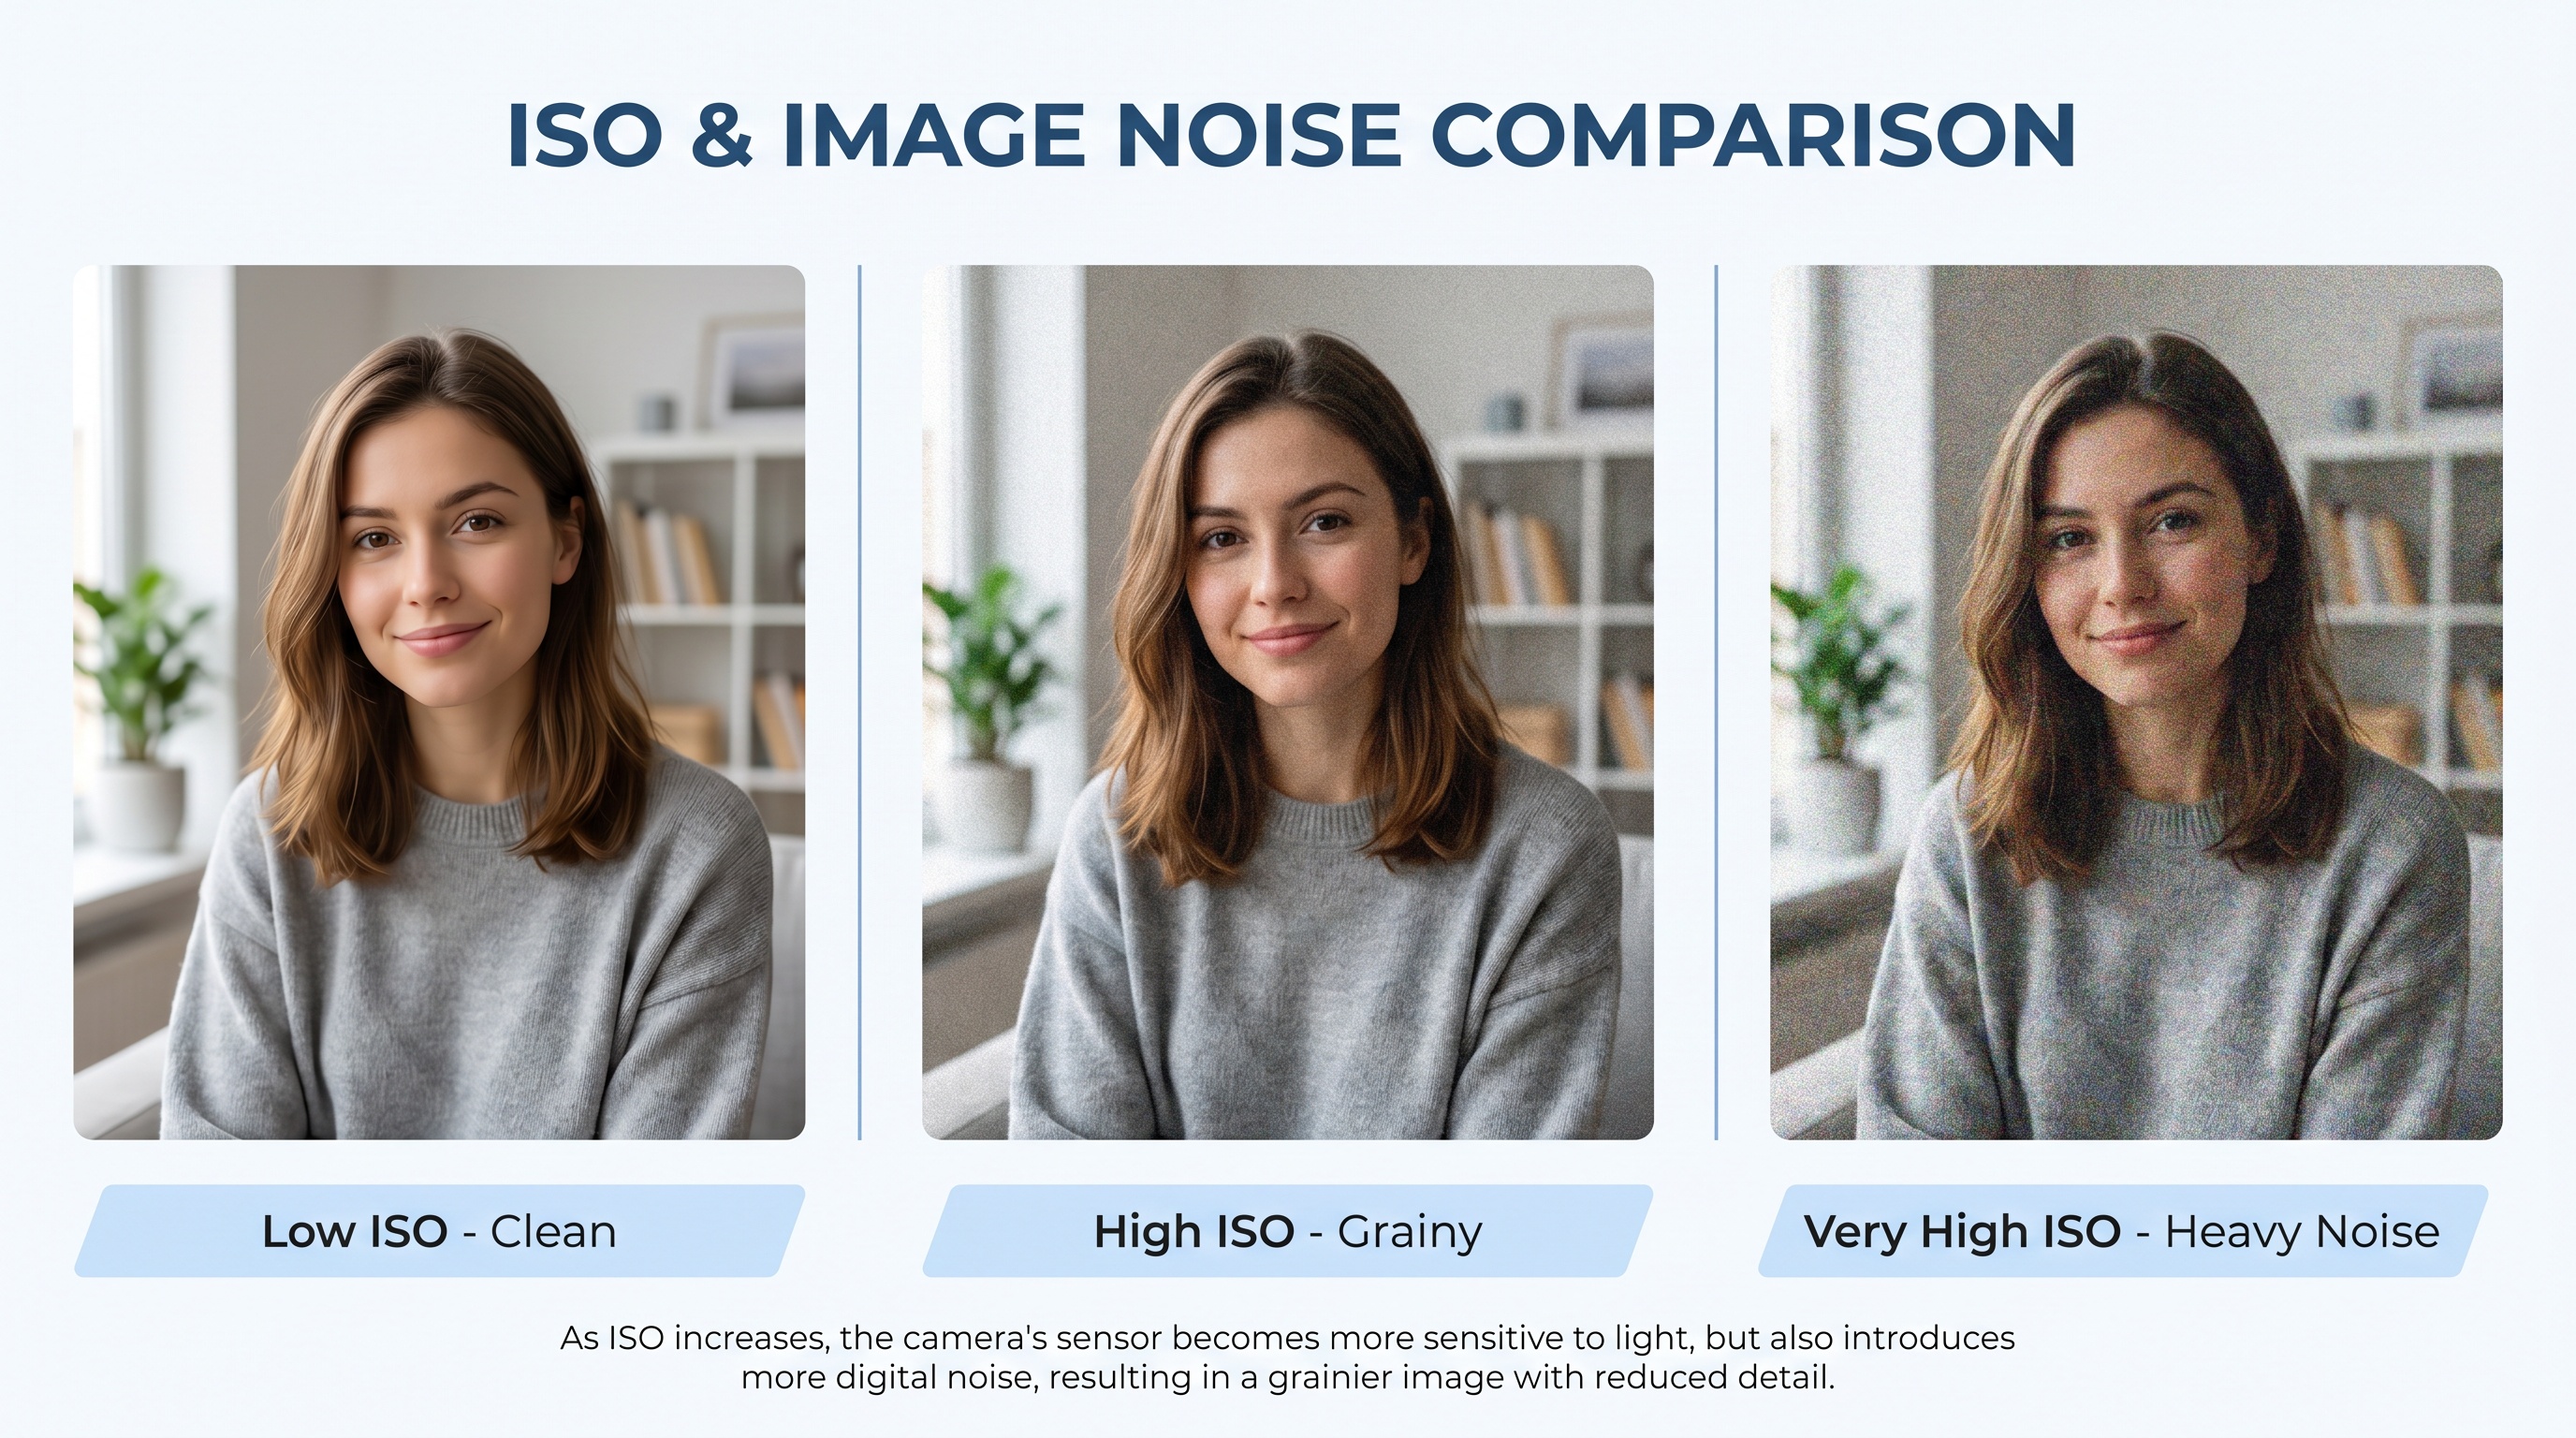
Almost all grain traces back to one thing: not enough light hitting the sensor. When your camera can't collect enough photons, it compensates by amplifying the weak signal it did get — and amplifying signal also amplifies the random noise riding along with it. That noise shows up as the colored or gray specks you see.
Four situations cause most of the grainy photos people want to fix:
- High ISO. ISO is the camera's sensitivity dial. Crank it to shoot a dim scene without a tripod and you trade brightness for noise. A photo shot at ISO 6400 in a dark bar will be far grainier than the same scene at ISO 200 in daylight.
- Small phone sensors. The sensor in a phone is a fraction of the size of a full-frame camera's. Less surface area means less light captured per pixel, so phones hit their noisy ISO range much sooner. That's why your shots look fine outdoors and fall apart indoors at night.
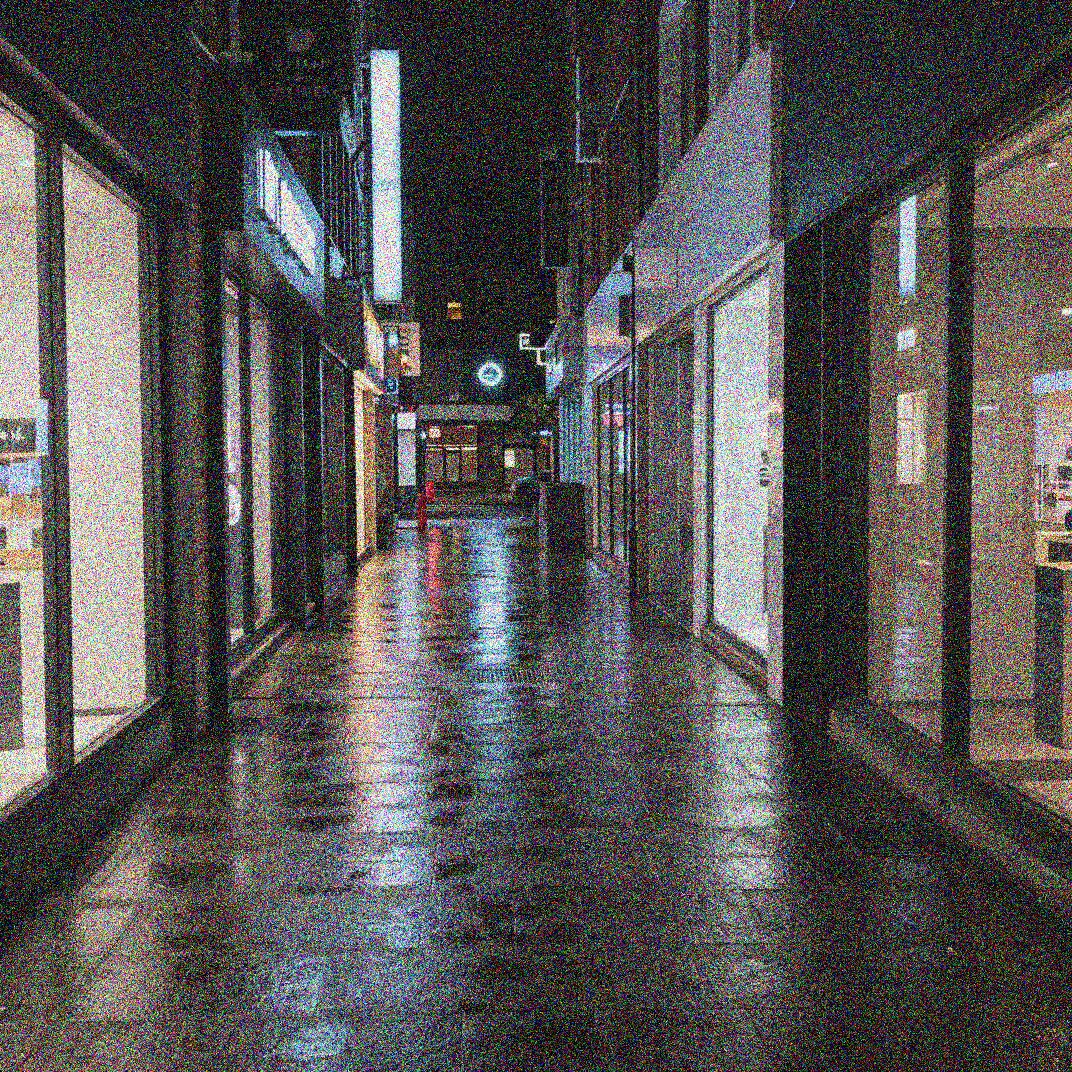
- Low light and long handheld shots. Dim restaurants, birthday candles, concerts, the moon. Anywhere you're shooting without a flash or a tripod, the camera leans on ISO to keep the shot bright enough to see.
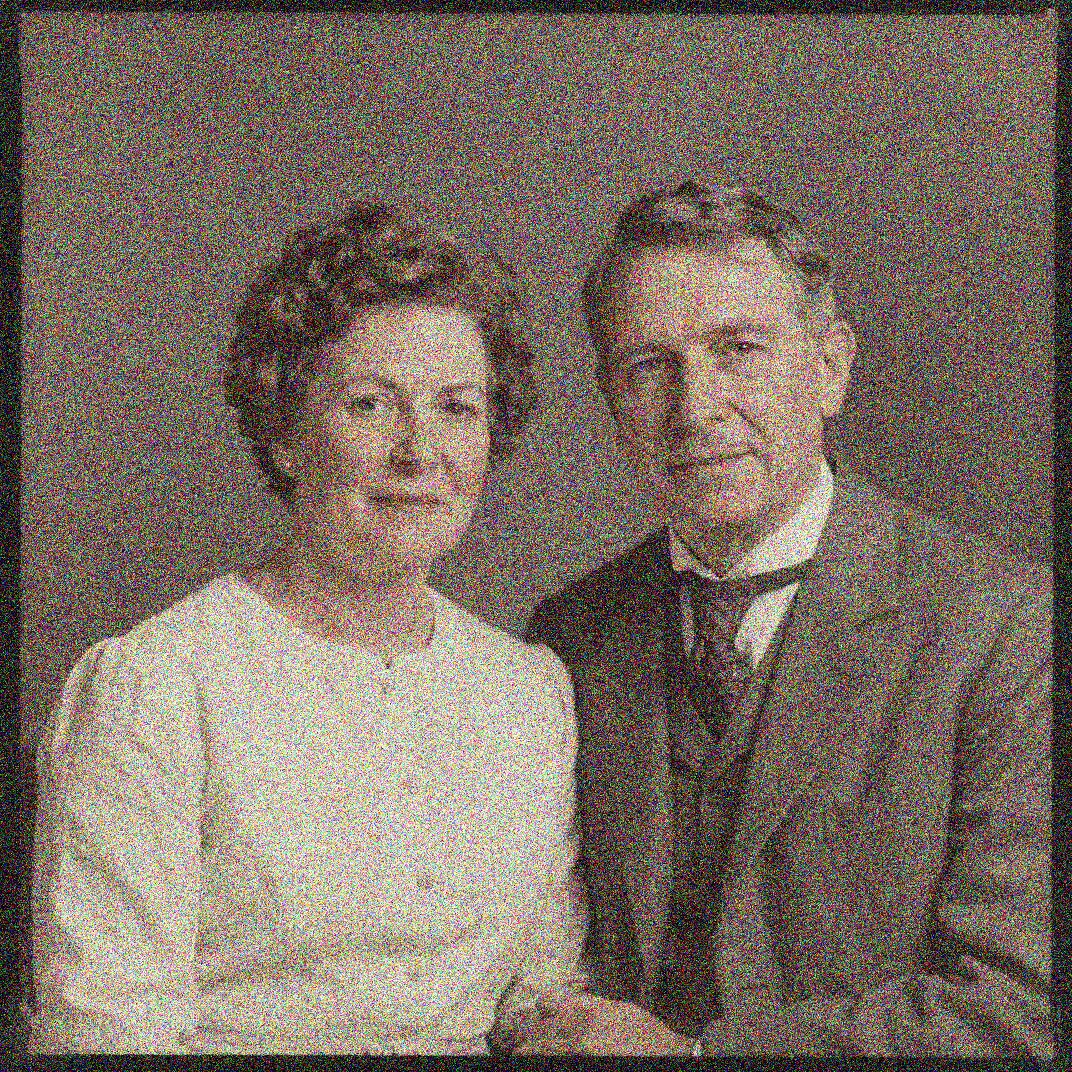
- Old film scans. Film has physical grain baked into the emulsion. When you scan a 35mm negative or an old print, the scanner faithfully records that grain — plus its own sensor noise in the dark areas. This is why scanned old photos often look noisier than the print did in your hand.
There's a difference worth knowing: luminance noise is the gray, sandpaper-like texture, and color noise is the red, green, and blue speckle that looks like confetti in shadows. Color noise is the uglier of the two, and it's also the easier one for AI to remove cleanly.
How AI Denoising Removes the Grain
The old way to remove noise from a photo was a blur slider. Push it and the software averaged neighboring pixels together — which smoothed the speckle but also wiped out eyelashes, fabric weave, and skin texture. You ended up trading one problem for a softer, plastic-looking one.
AI denoising works differently. The models were trained on millions of image pairs — a clean shot and a deliberately noisy copy of the same scene — until they learned what grain looks like versus what real detail looks like. So when you feed in a noisy photo, the model can tell that a random gray speck in a shadow is noise, while the fine lines of an eyelash are signal. It removes the first and protects the second.

Because the model rebuilds tones rather than blurring them, edges stay crisp. Skin looks like skin instead of porcelain. And the whole thing runs in seconds, with no sliders to babysit. If you want the deeper version of how this works, we broke it down in how AI photo restoration works.
How to Fix Grainy Photos in 4 Steps
The whole process takes about a minute
- Step 1: Start from the best version you have. Use the original file straight from your camera or phone, not a screenshot or a re-saved copy. For old prints, scan at 600 DPI and save as PNG or TIFF so the AI has clean data to work with.
- Step 2: Upload it to the free restore tool. Drop the file into BestPhoto's denoiser. There's no plugin to install and no account required to try it.
- Step 3: Let the AI process the noise. The model analyzes the photo, separates grain from real detail, and rebuilds clean tones. This usually takes around 30 seconds.
- Step 4: Compare and download. Check the result against the original at full size. If a stubborn area still has speckle, run it again — results can vary slightly between passes. Then download the clean version.
Got a Grainy Photo Open Right Now?
Fix it in about 30 seconds. No sign-up, no watermark.
Who Needs to Fix Noisy Photos
For Phone Shooters
- • Salvage grainy iPhone photos from dim restaurants
- • Clean up zoomed-in concert and event shots
- • Rescue night and indoor party pictures
- • Fix screenshots that came out speckled
For Families
- • Denoise old scanned film photos and slides
- • Clean grain off inherited prints before reprinting
- • Smooth out noisy shots from disposable cameras
- • Prep memories for a photo book or frame
For Creators
- • Clean up content shot in low light
- • Fix product photos taken without studio lighting
- • Reduce noise before upscaling for print
- • Tidy thumbnails and social posts
For Sellers
- • Make listing photos look sharp and clean
- • Fix grainy real estate interior shots
- • Improve secondhand item photos for marketplaces
- • Present a more professional catalog
See the Grain Disappear
 Before
 After
AfterLow-light portrait
High-ISO color noise removed while eyelashes and catchlights stay sharp.
 Before
 After
AfterGrainy iPhone night shot
Speckle cleared from the sky and shadows without softening the building edges.
 Before
 After
AfterDenoised old film scan
Decades-old film grain and scanner noise smoothed without losing the original look.
 Before
 After
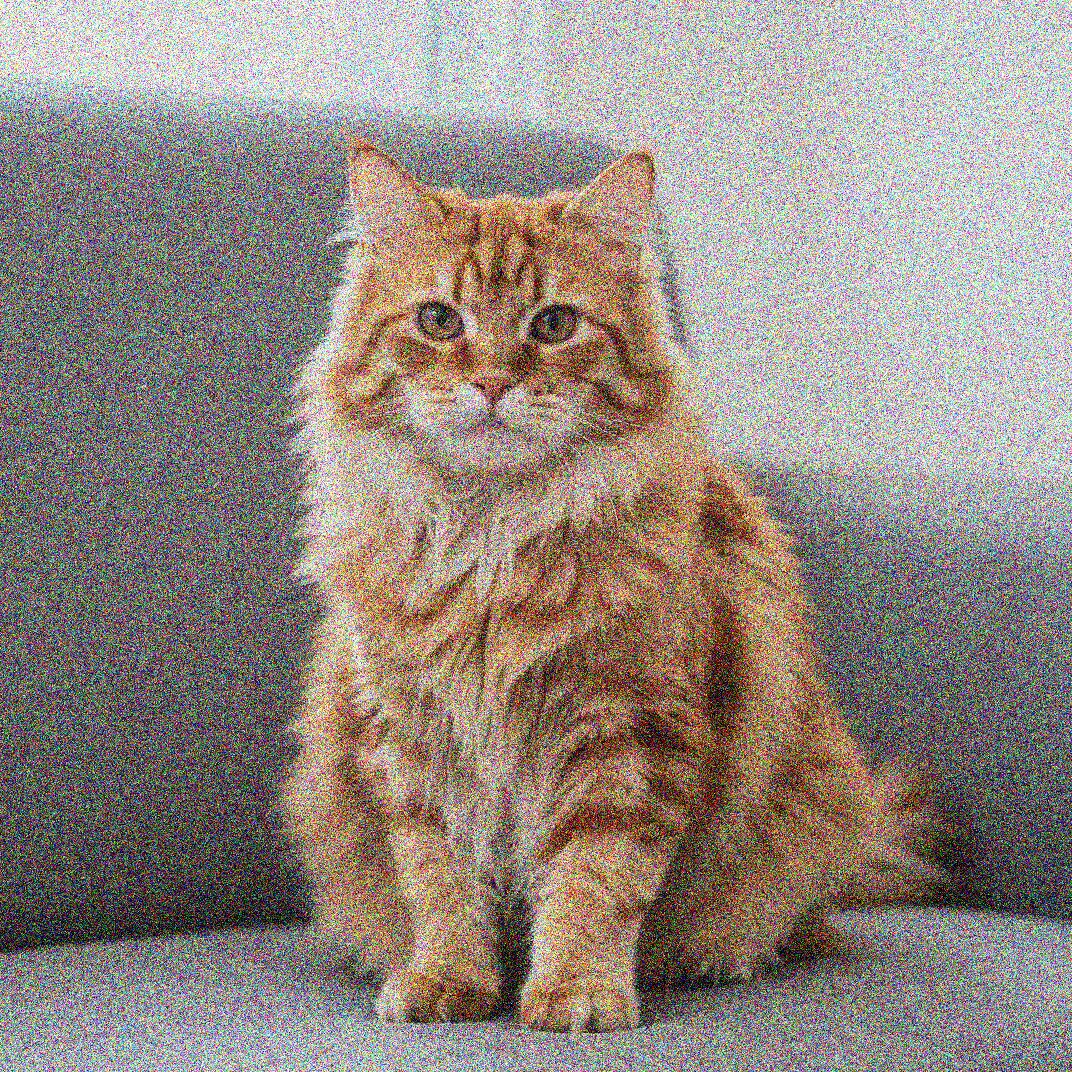
AfterIndoor high-ISO snapshot
Noise pulled out of dark fur while whiskers and fine texture stay intact.
Once the grain is gone, a noisy photo often has more usable resolution than you'd expect. If you want to make it bigger for a print or a frame, run the cleaned file through an AI upscaler — denoising first, upscaling second, always gives a cleaner result than the other way around.
Pro tips
- • Denoise before you upscale. Upscaling a grainy photo just makes the grain bigger. Clean it first.
- • Use the original file, not a screenshot. Each re-save and crop throws away data the AI could have used.
- • Don't over-process. A little texture reads as real. Pushing for perfectly smooth can tip a photo into the plastic look.
- • Shoot to avoid grain next time. Steady the phone, tap to lock exposure on a bright area, and skip pinch-to-zoom — cropping in later beats letting the phone push ISO.
- • Scan old prints at 600 DPI as PNG or TIFF. A clean, lossless scan gives the denoiser far more to work with than a phone snap of the print.
That grainy shot is fixable. Bring it back.
You can't reshoot the moment, but you can clean it up. Upload the photo and let the AI strip out the noise while keeping the detail. Free, no sign-up, results in about 30 seconds.
Frequently asked questions
Why are my photos grainy?
Grain is sensor noise. When there isn't enough light, your camera raises the ISO to brighten the shot, and that amplification turns random sensor signal into visible specks. Small phone sensors, dim rooms, and night shots are the usual causes. Old film scans look grainy because the film itself had grain that the scanner captured.
How do I remove grain from photos for free?
Upload the photo to an AI denoiser like BestPhoto's free restore tool. The model separates real detail from random noise and rebuilds clean tones in about 30 seconds. No editing skill, plugins, or sign-up required.
How do I fix grainy iPhone photos?
iPhone grain almost always comes from low light or heavy digital zoom, where the phone pushes ISO and crops into the sensor. Run the photo through an AI noise reduction tool to clean the speckle. To avoid it next time, keep the phone steady, tap to lock exposure, and avoid pinch-to-zoom.
Does removing noise make photos blurry?
Old slider-based denoise tools smeared detail because they blurred everything equally. Modern AI denoisers were trained on millions of clean and noisy pairs, so they tell grain apart from real texture like hair, fabric, and skin. Edges stay sharp while the speckle goes away.
Can I denoise old scanned film photos?
Yes. Scan at 600 DPI or higher, save as PNG or TIFF, then run the scan through AI denoising. The same model that removes digital sensor noise also reduces film grain and scanner artifacts, while a separate restoration pass can fix fading and scratches.
Ready to Transform Your Photos?
Join thousands of users creating amazing AI-generated photos with BestPhoto