How to Restore Moldy Photos Safely (Before You Lose Them Forever)
Moldy family photos need safety-first handling, then scanning, then AI. Step-by-step guide with respirator protocol, freeze-first method, and free restoration.
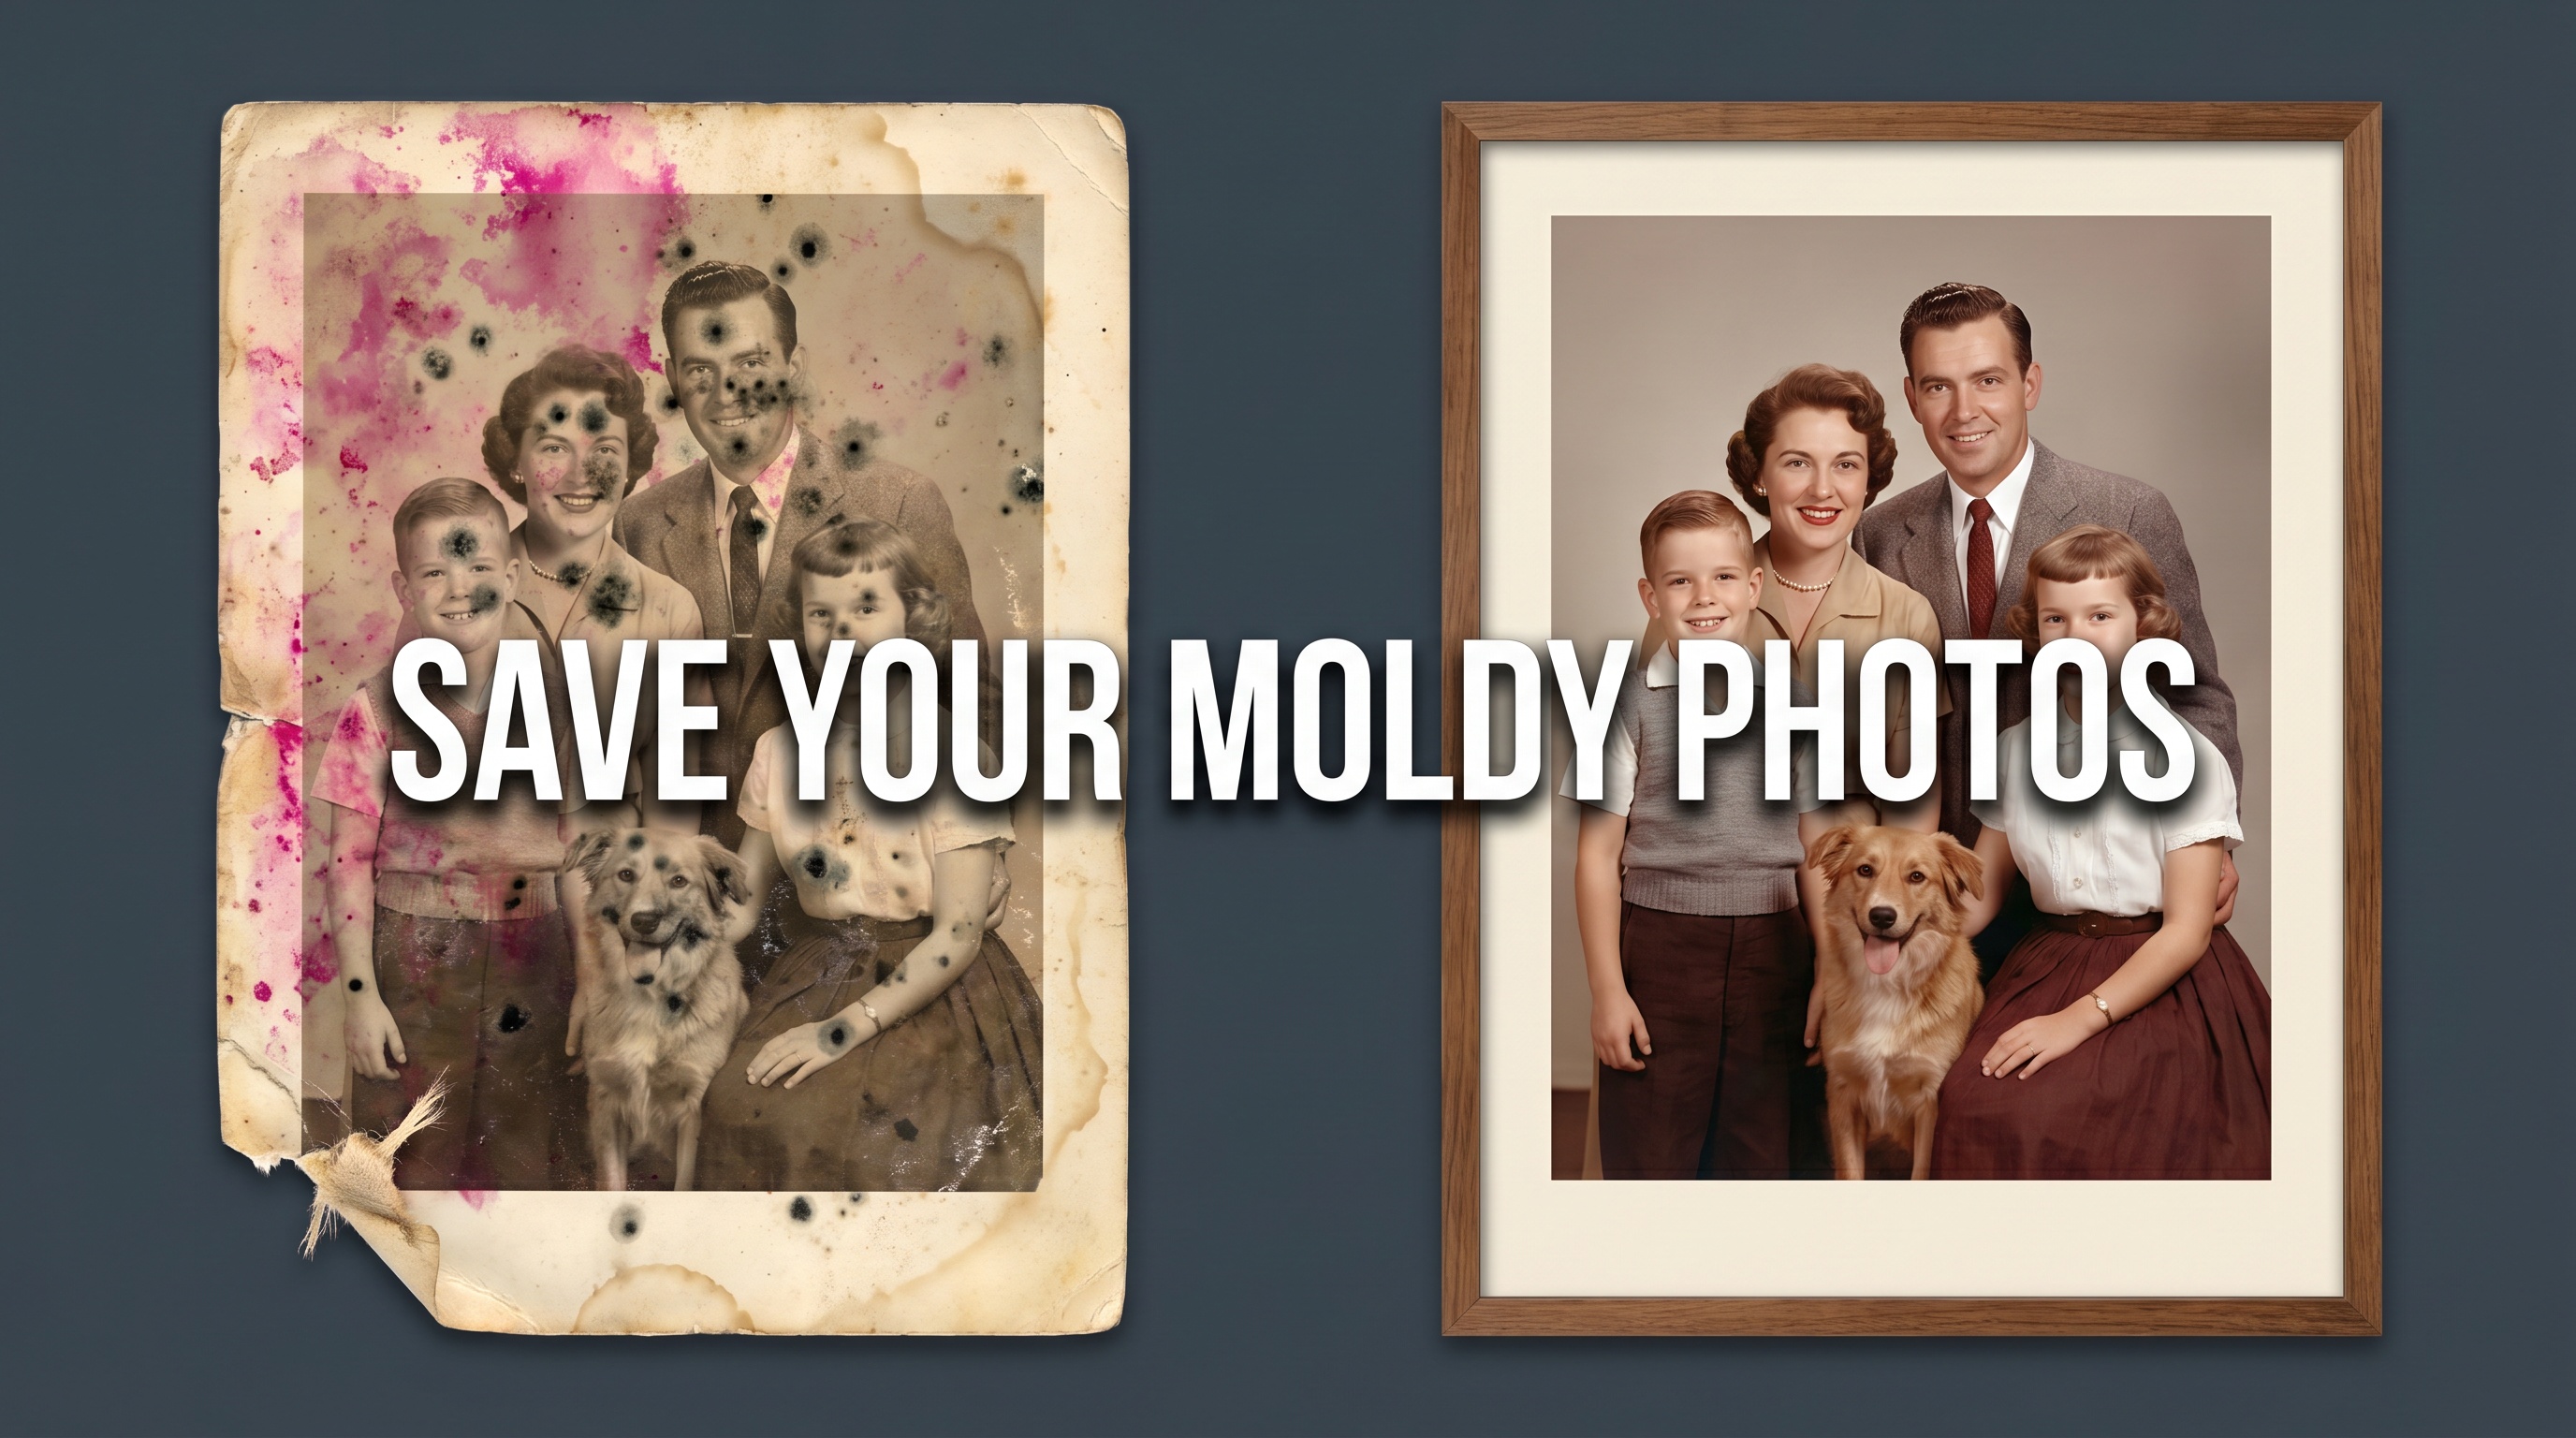
Your aunt died and the family cleaned out her basement. Now there's a box of 200 photos on your kitchen table — and half of them are fused together by mold. Before you touch anything else, put on a respirator.
Mold on photographs is dangerous. Some species, like Stachybotrys and Aspergillus, produce mycotoxins you don't want in your lungs. Mold also digests the gelatin emulsion that holds the image, so the damage gets worse every day the spores stay active. These photos can't wait a week. You might have to deal with them today.
Quick answer: Gear up (N95 + nitrile + goggles), stabilize the photos by drying or freezing, gently dry-brush dormant mold outdoors, scan at 600 DPI, then run the scans through AI restoration. Physical stabilization first — AI cannot fix photos that are still actively decomposing.
Before you begin
- • If you have asthma, allergies, or a compromised immune system, stop here. Send the photos to a professional conservator — this is not a DIY job for you.
- • Do not handle moldy material indoors without ventilation. Garage, patio, or outside only.
- • Surgical masks do not filter mold spores. You need N95 or P100.
What Mold Actually Does to a Photograph
The top layer of a gelatin-silver print — the shiny part — is made of gelatin. Gelatin is organic. Mold eats it. Once the mold colony establishes, three things happen at different rates:

- Pigment staining. Some fungi produce colored compounds, pink, green, and purple, that soak into the emulsion. Surface-cleaning won't remove them. AI restoration can, because pigment stains behave like color shifts rather than missing data.
- Pitting and emulsion loss. The mold literally digests the gelatin, creating circular craters where image detail used to be. This is permanent. AI will inpaint these areas, but it is guessing at what was there.
- Fusion. Moldy photos in a humid stack become glued together at the emulsion layer. Pulling them apart rips image detail off one and onto the other. Conservators will sometimes freeze and then slowly peel these; amateurs usually shouldn't.
The key principle from the Northeast Document Conservation Center: physical intervention first, digital intervention second. AI can't fix what's still falling apart.
Step 1: Gear Up Properly
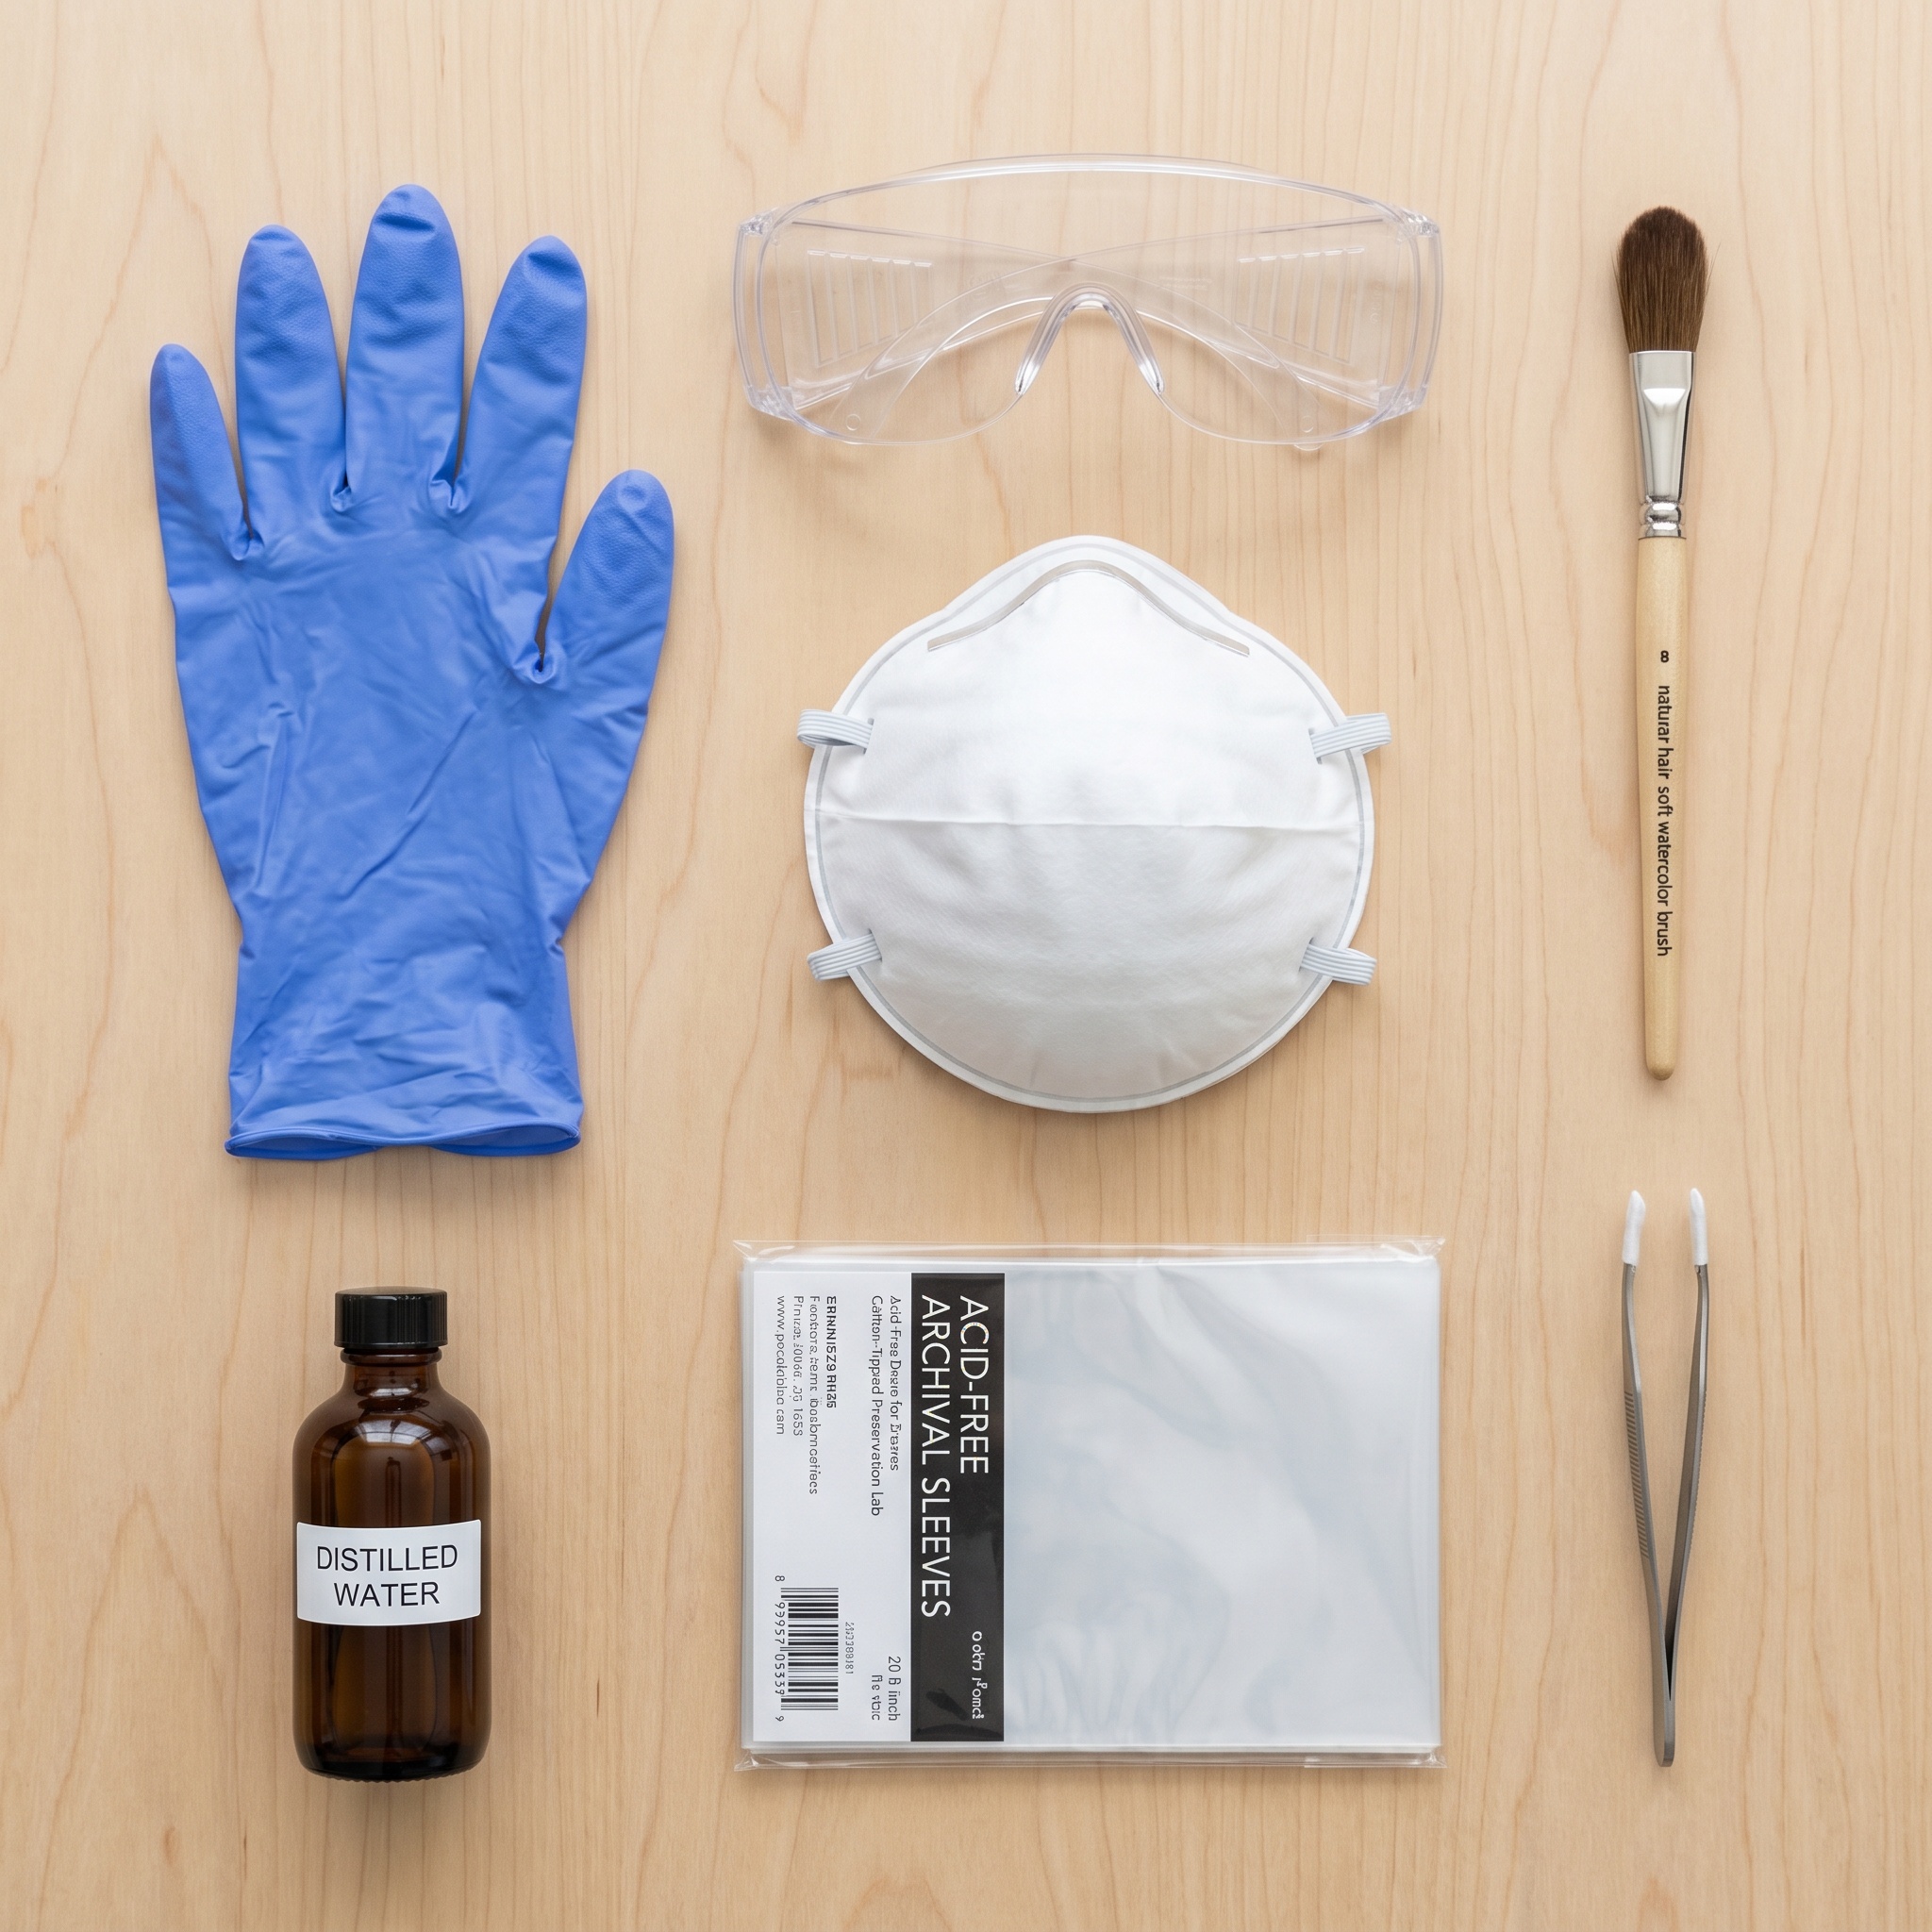
What you actually need
- • N95 or P100 respirator (hardware store, ~$10–25) — mold spores are 3–40 microns; surgical masks pass them right through.
- • Nitrile gloves — keep your skin oil off the photos and the mold off your skin.
- • Safety goggles — spores can irritate eyes; glasses aren't a seal.
- • Soft natural-hair brush — a sable or natural watercolor brush. Never use anything synthetic and stiff.
- • Acid-free archival sleeves or folders — for storing cleaned photos separately from moldy ones.
- • A well-ventilated outdoor space — patio, garage with open door, back yard.
Step 2: Stabilize Before You Clean
Most guides jump straight to cleaning. Don't. If your photos are wet or the mold is actively growing, you'll only spread the colony. Stabilize first.
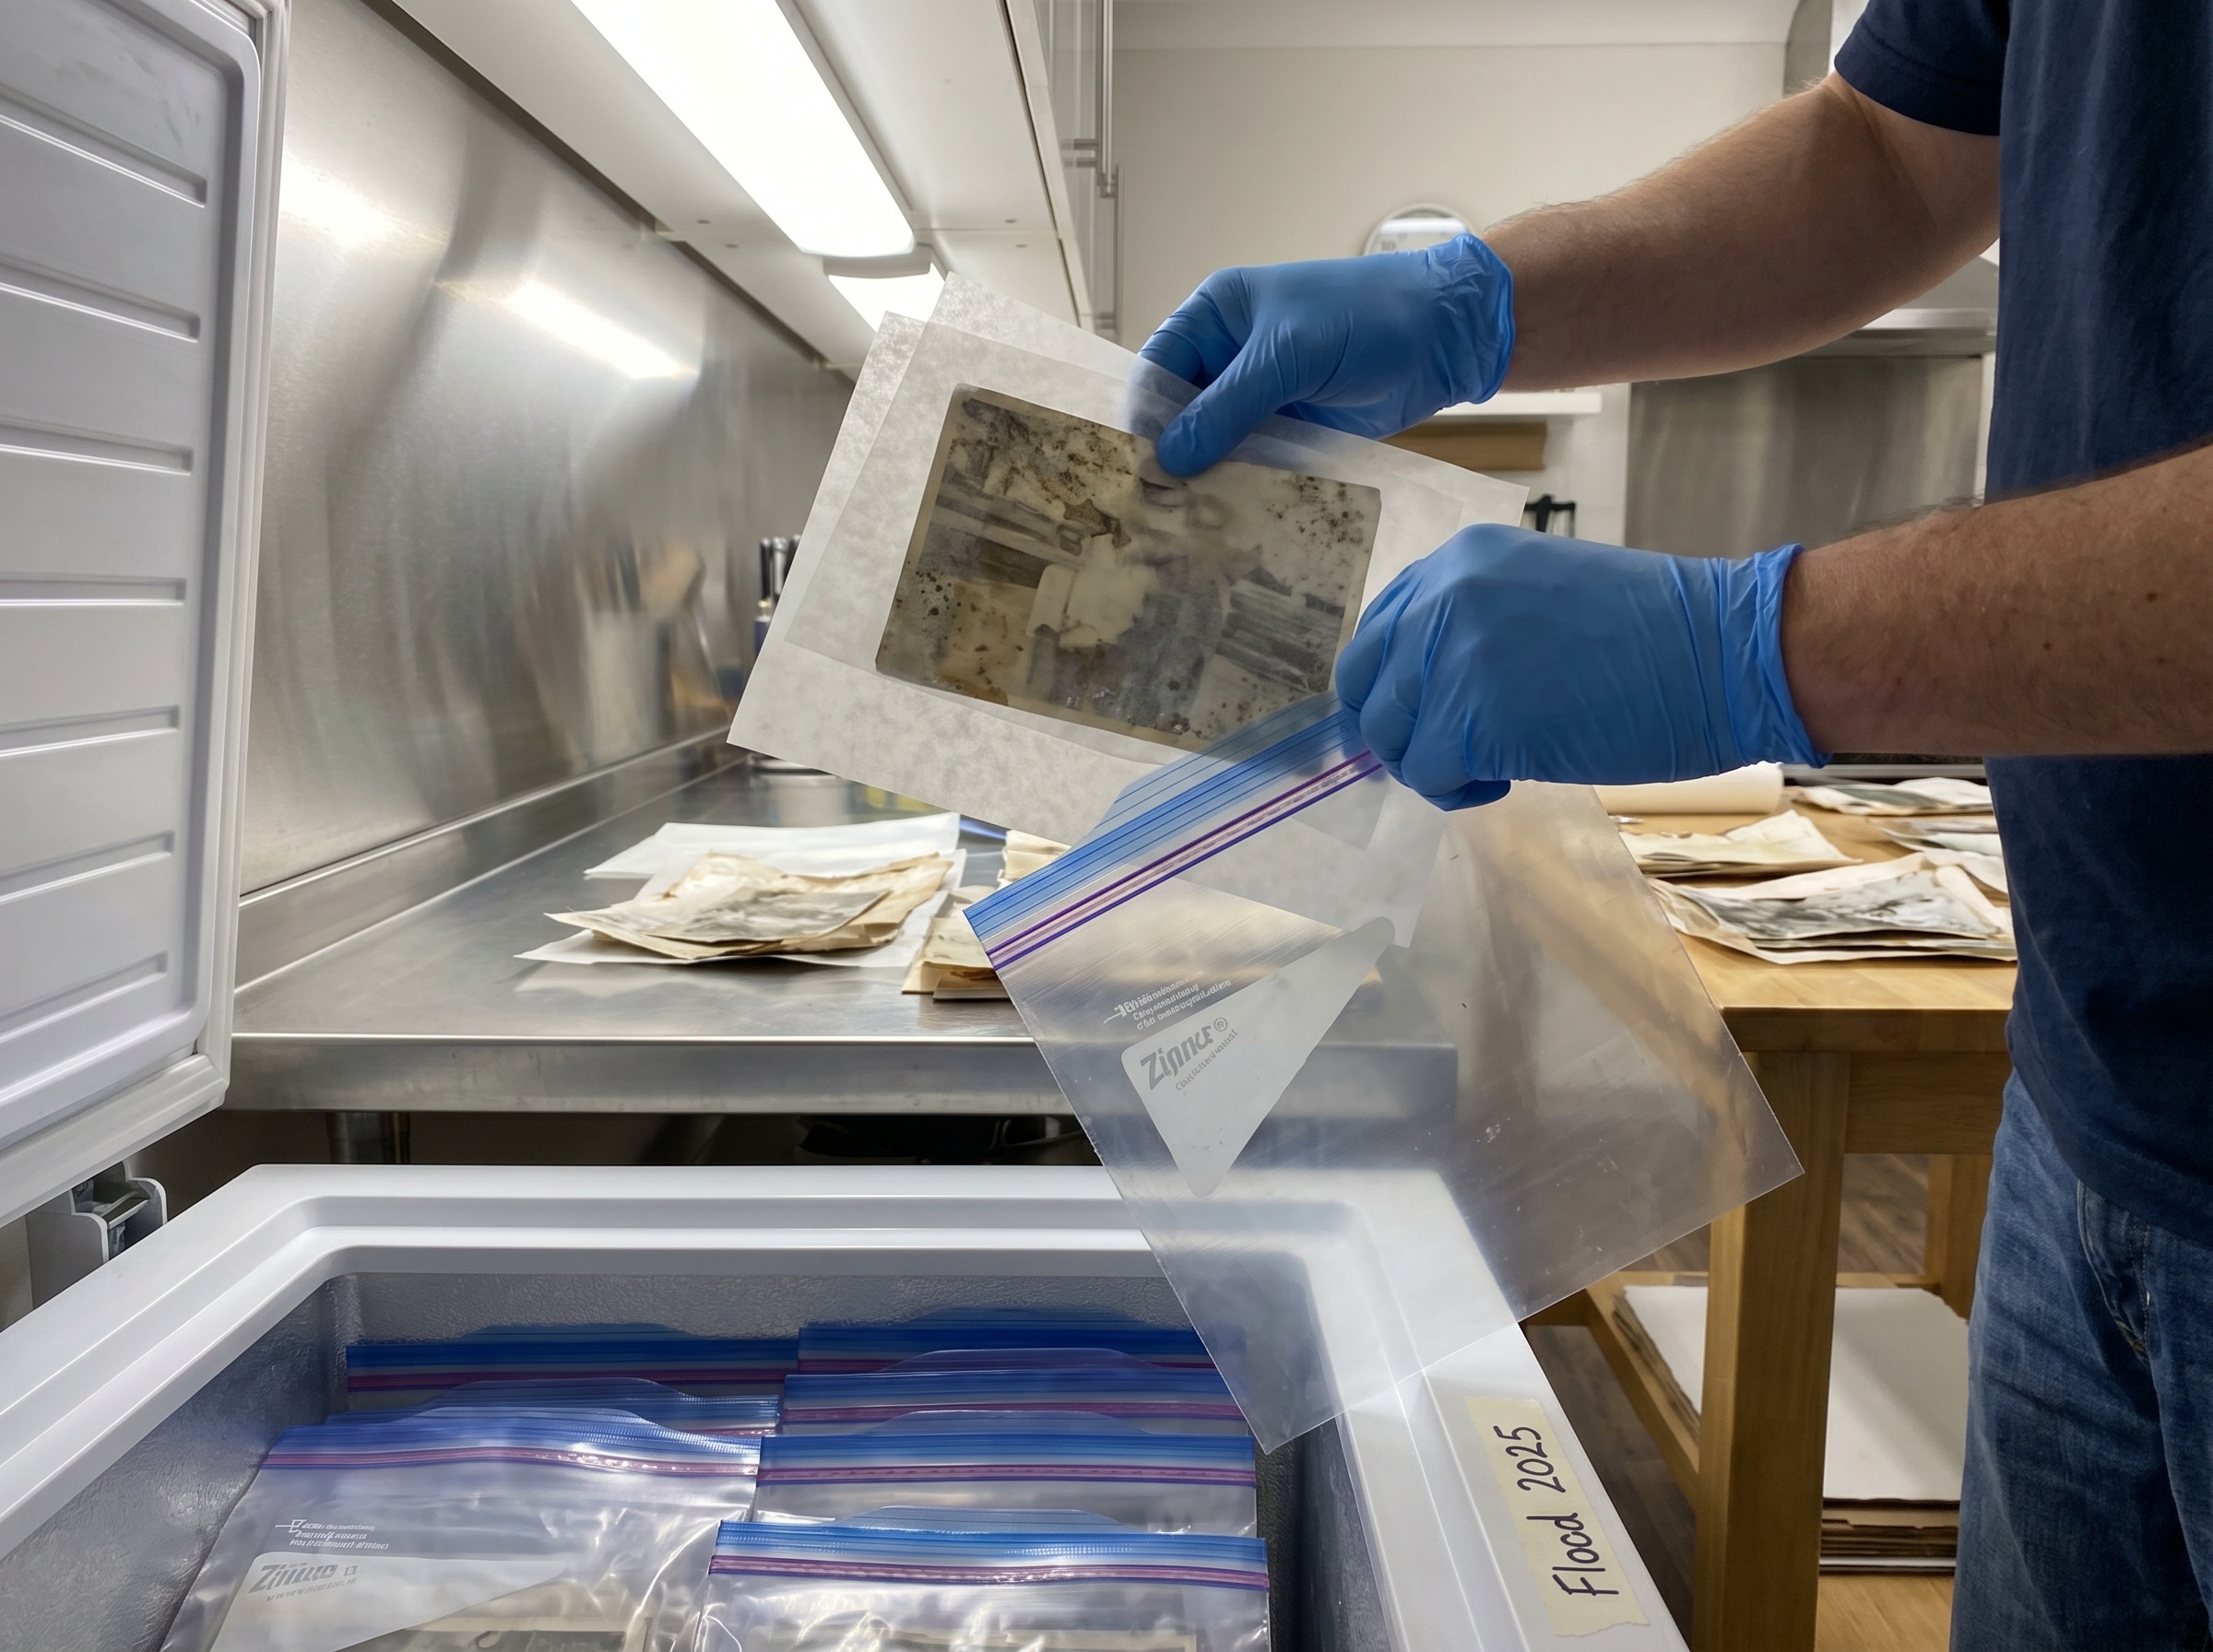
The freeze-first protocol (what archives do)
- Step 2a: Separate every photo with wax paper. This is what prevents them from fusing together in the bag.
- Step 2b: Seal in ziplock freezer bags — no more than 10–15 photos per bag, laid flat.
- Step 2c: Freeze at 0°F (-18°C). Freezing halts mold metabolism and stops emulsion fusion. The National Archives has recovered photos frozen for months this way.
- Step 2d: Thaw one bag at a time when you're ready to work. Let them reach room temperature sealed, then open to avoid condensation on the surface.
If the photos are dry but moldy, skip the freezer. Just keep them in a low-humidity environment (below 40% RH, a dehumidifier in a small room works) until you're ready to clean.
Step 3: Dry-Brush the Surface Mold
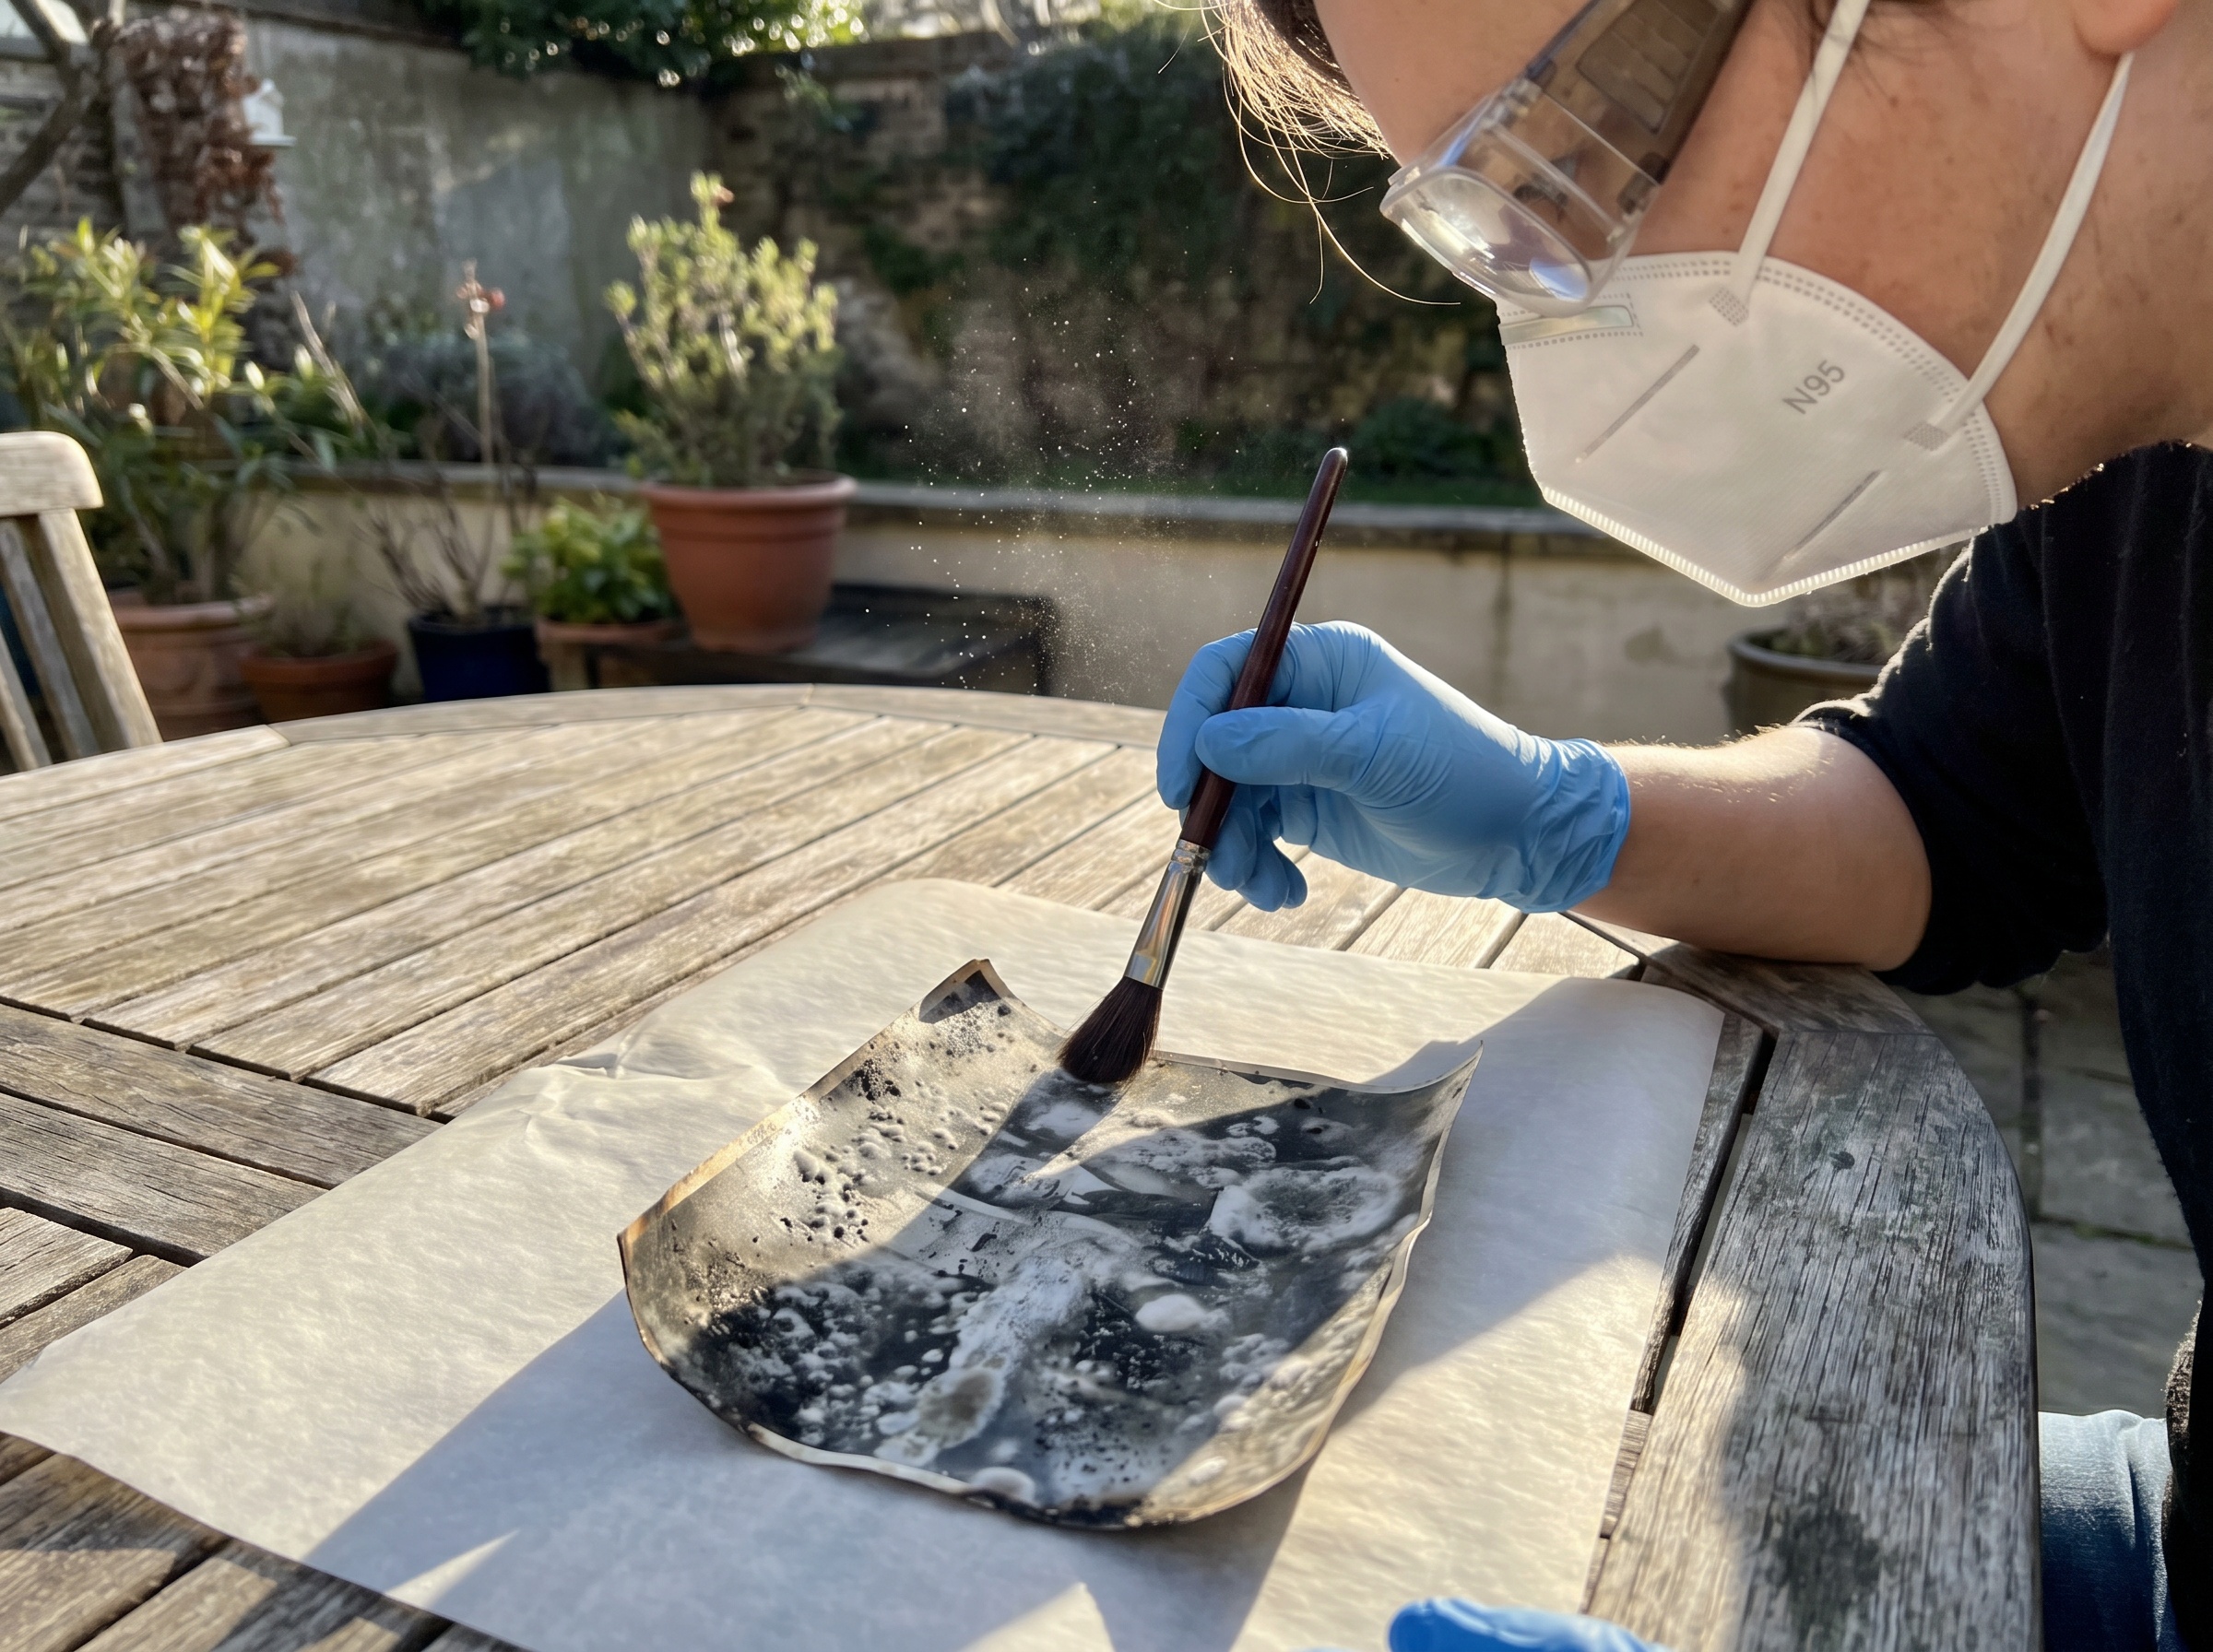
This is the one technique you absolutely have to do outdoors. Mold spores become airborne the moment you brush them. Indoors, you're just contaminating your house.
Rest the photo flat on a clean sheet of parchment or acid-free paper. With a soft brush, work from the center outward, using feather-light strokes. The goal is to lift dormant spores off the surface, not to scrub. Stop if the brush is pulling emulsion.
Do not use water. Do not use alcohol. Do not use the rubber-eraser trick you read about on Pinterest. Gelatin-silver prints are unstable in water, and solvent damage is permanent in a way mold damage often isn't.
Step 4: Scan Everything at 600 DPI
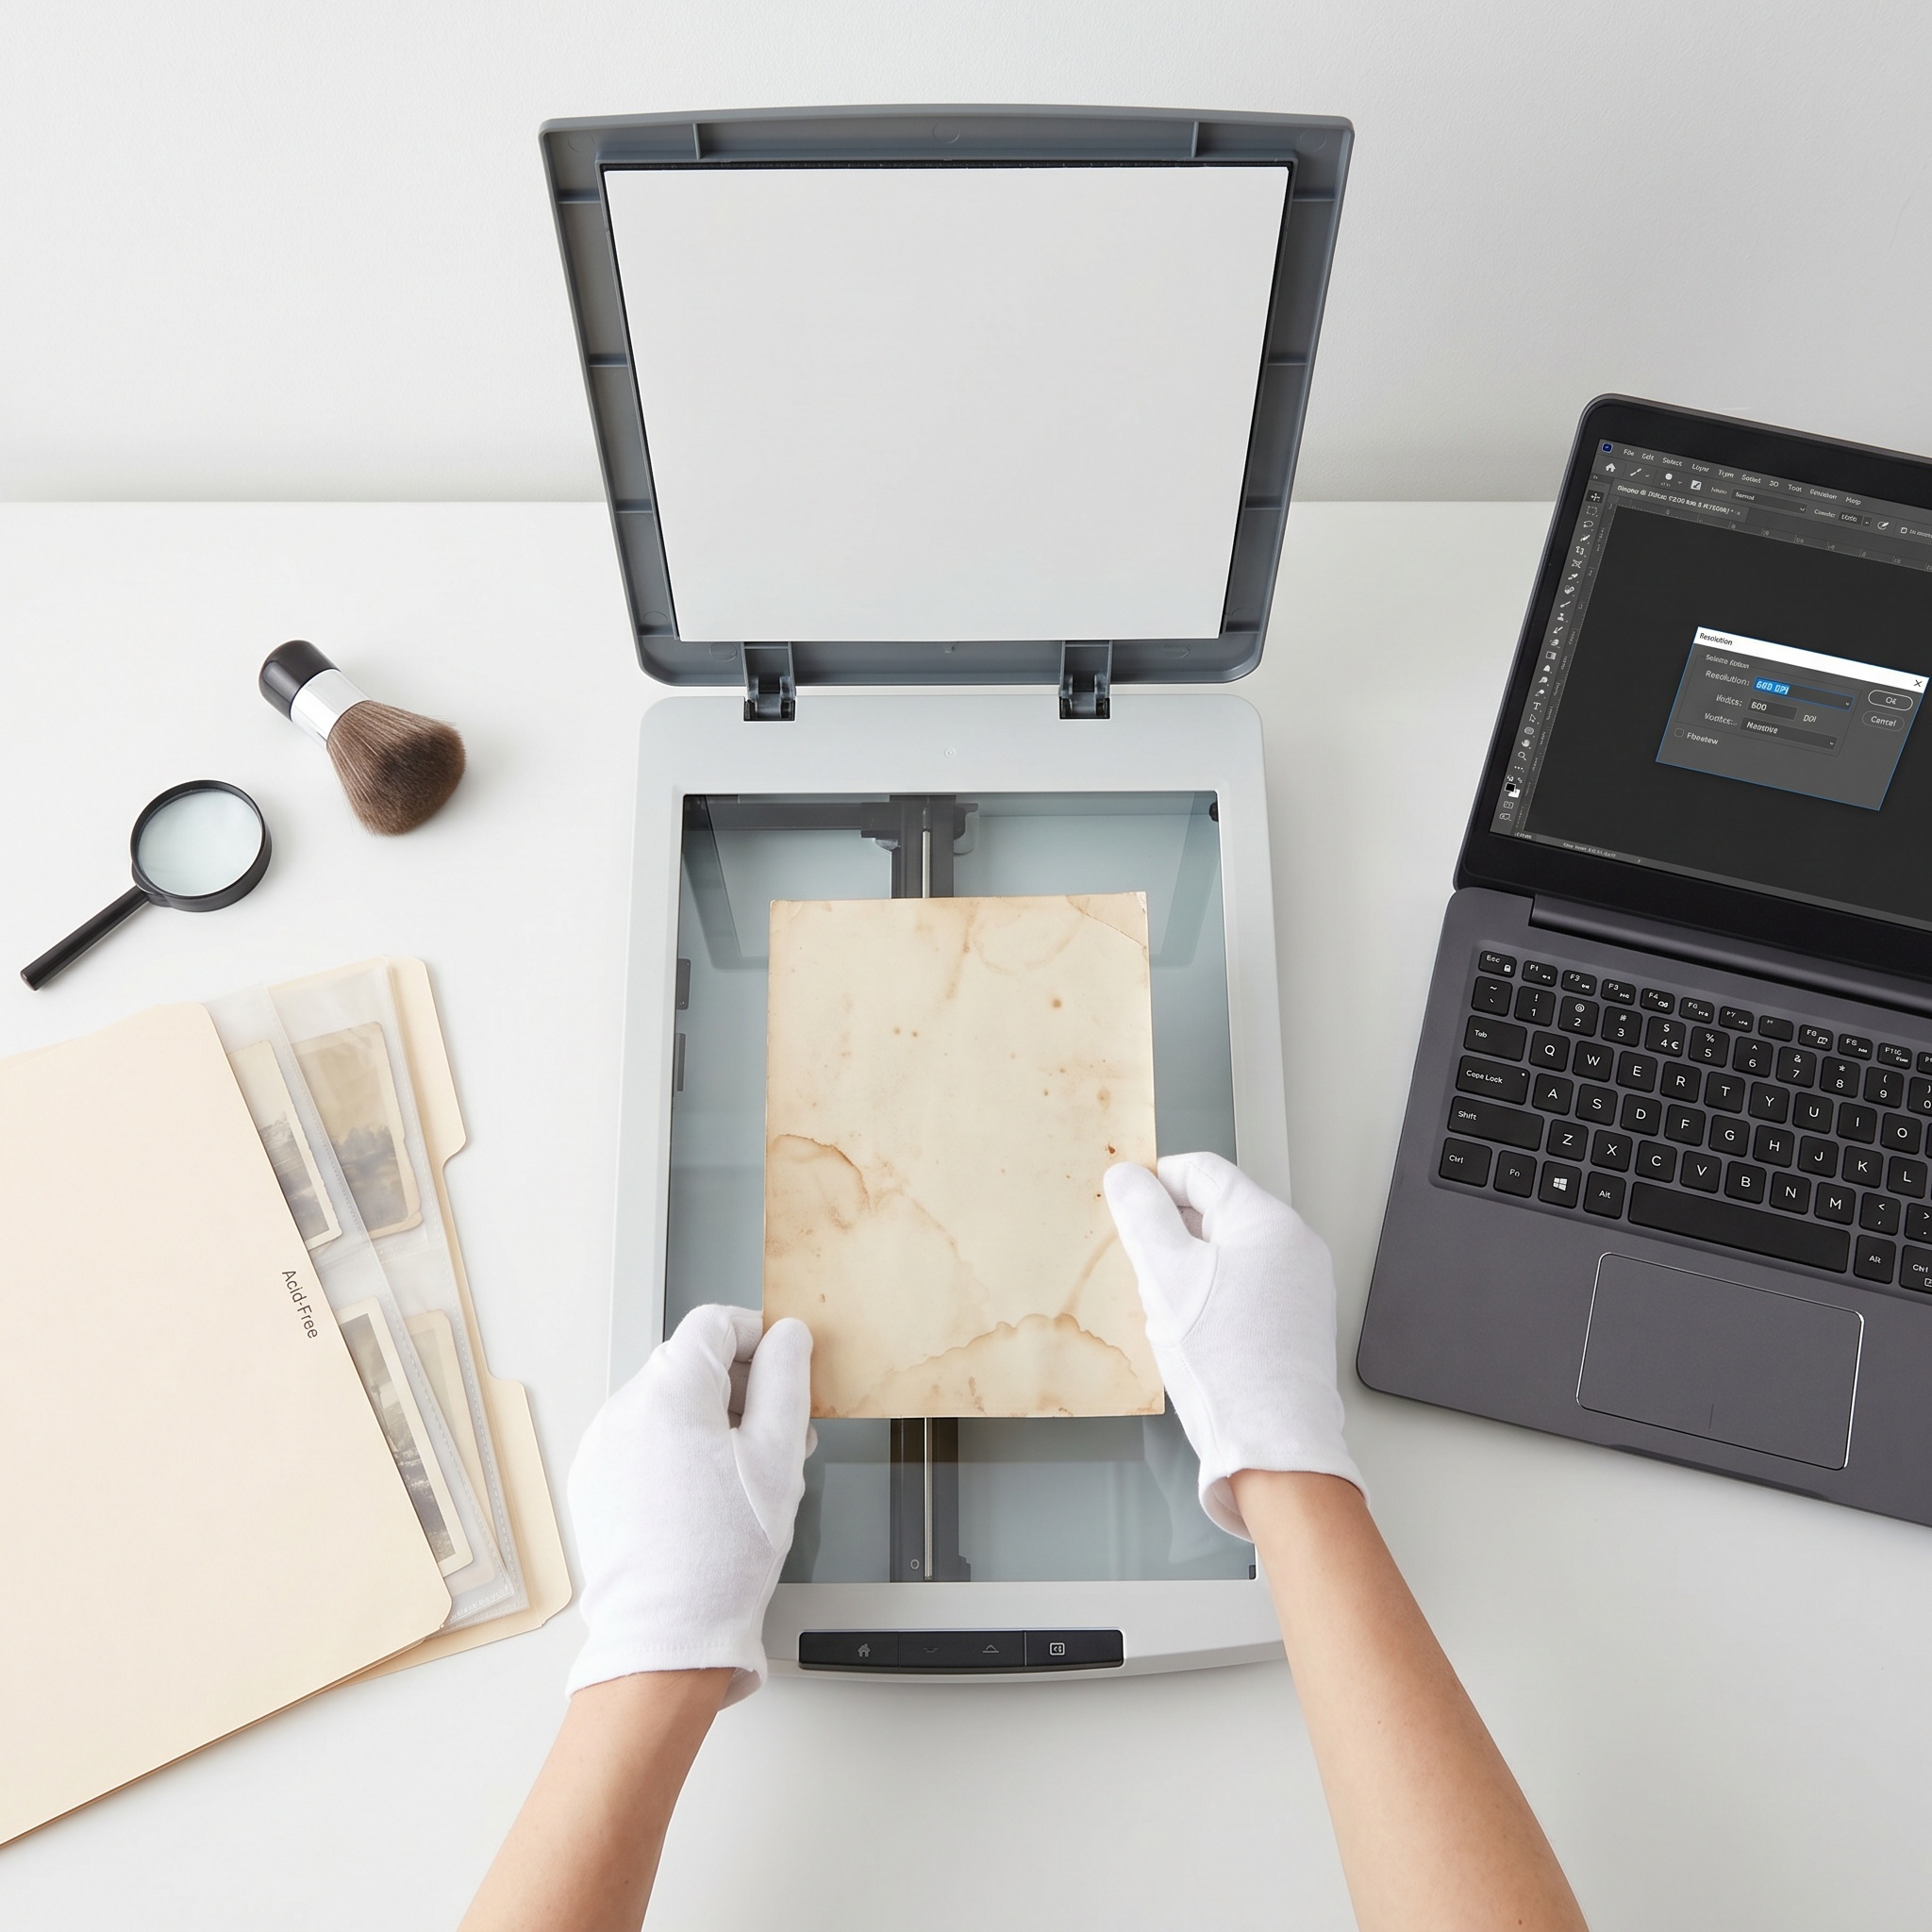
Once the active mold is gone and the photo is stable, get a clean scan. This is your safety copy. Even if you do nothing else, the digital scan preserves the photo. The physical print may not survive much longer.
- Scan at 600 DPI minimum. 1200 DPI for very small prints.
- Save as PNG or TIFF, not JPEG. Lossless formats preserve the damage faithfully for the AI to correct.
- Turn off auto-enhance in the scanner software. You'll get better results letting the AI do the correction than the scanner.
- Clean the scanner glass with a microfiber cloth every few scans — dust becomes permanent dots.
Got a Clean Scan?
Upload it to restore the image. About 30 seconds per photo.
Step 5: AI Handles the Staining and Pitting
This is where AI earns its keep. Modern restoration models handle pink pigment stains, black fungal spots, edge foxing, and residual discoloration in a single pass.
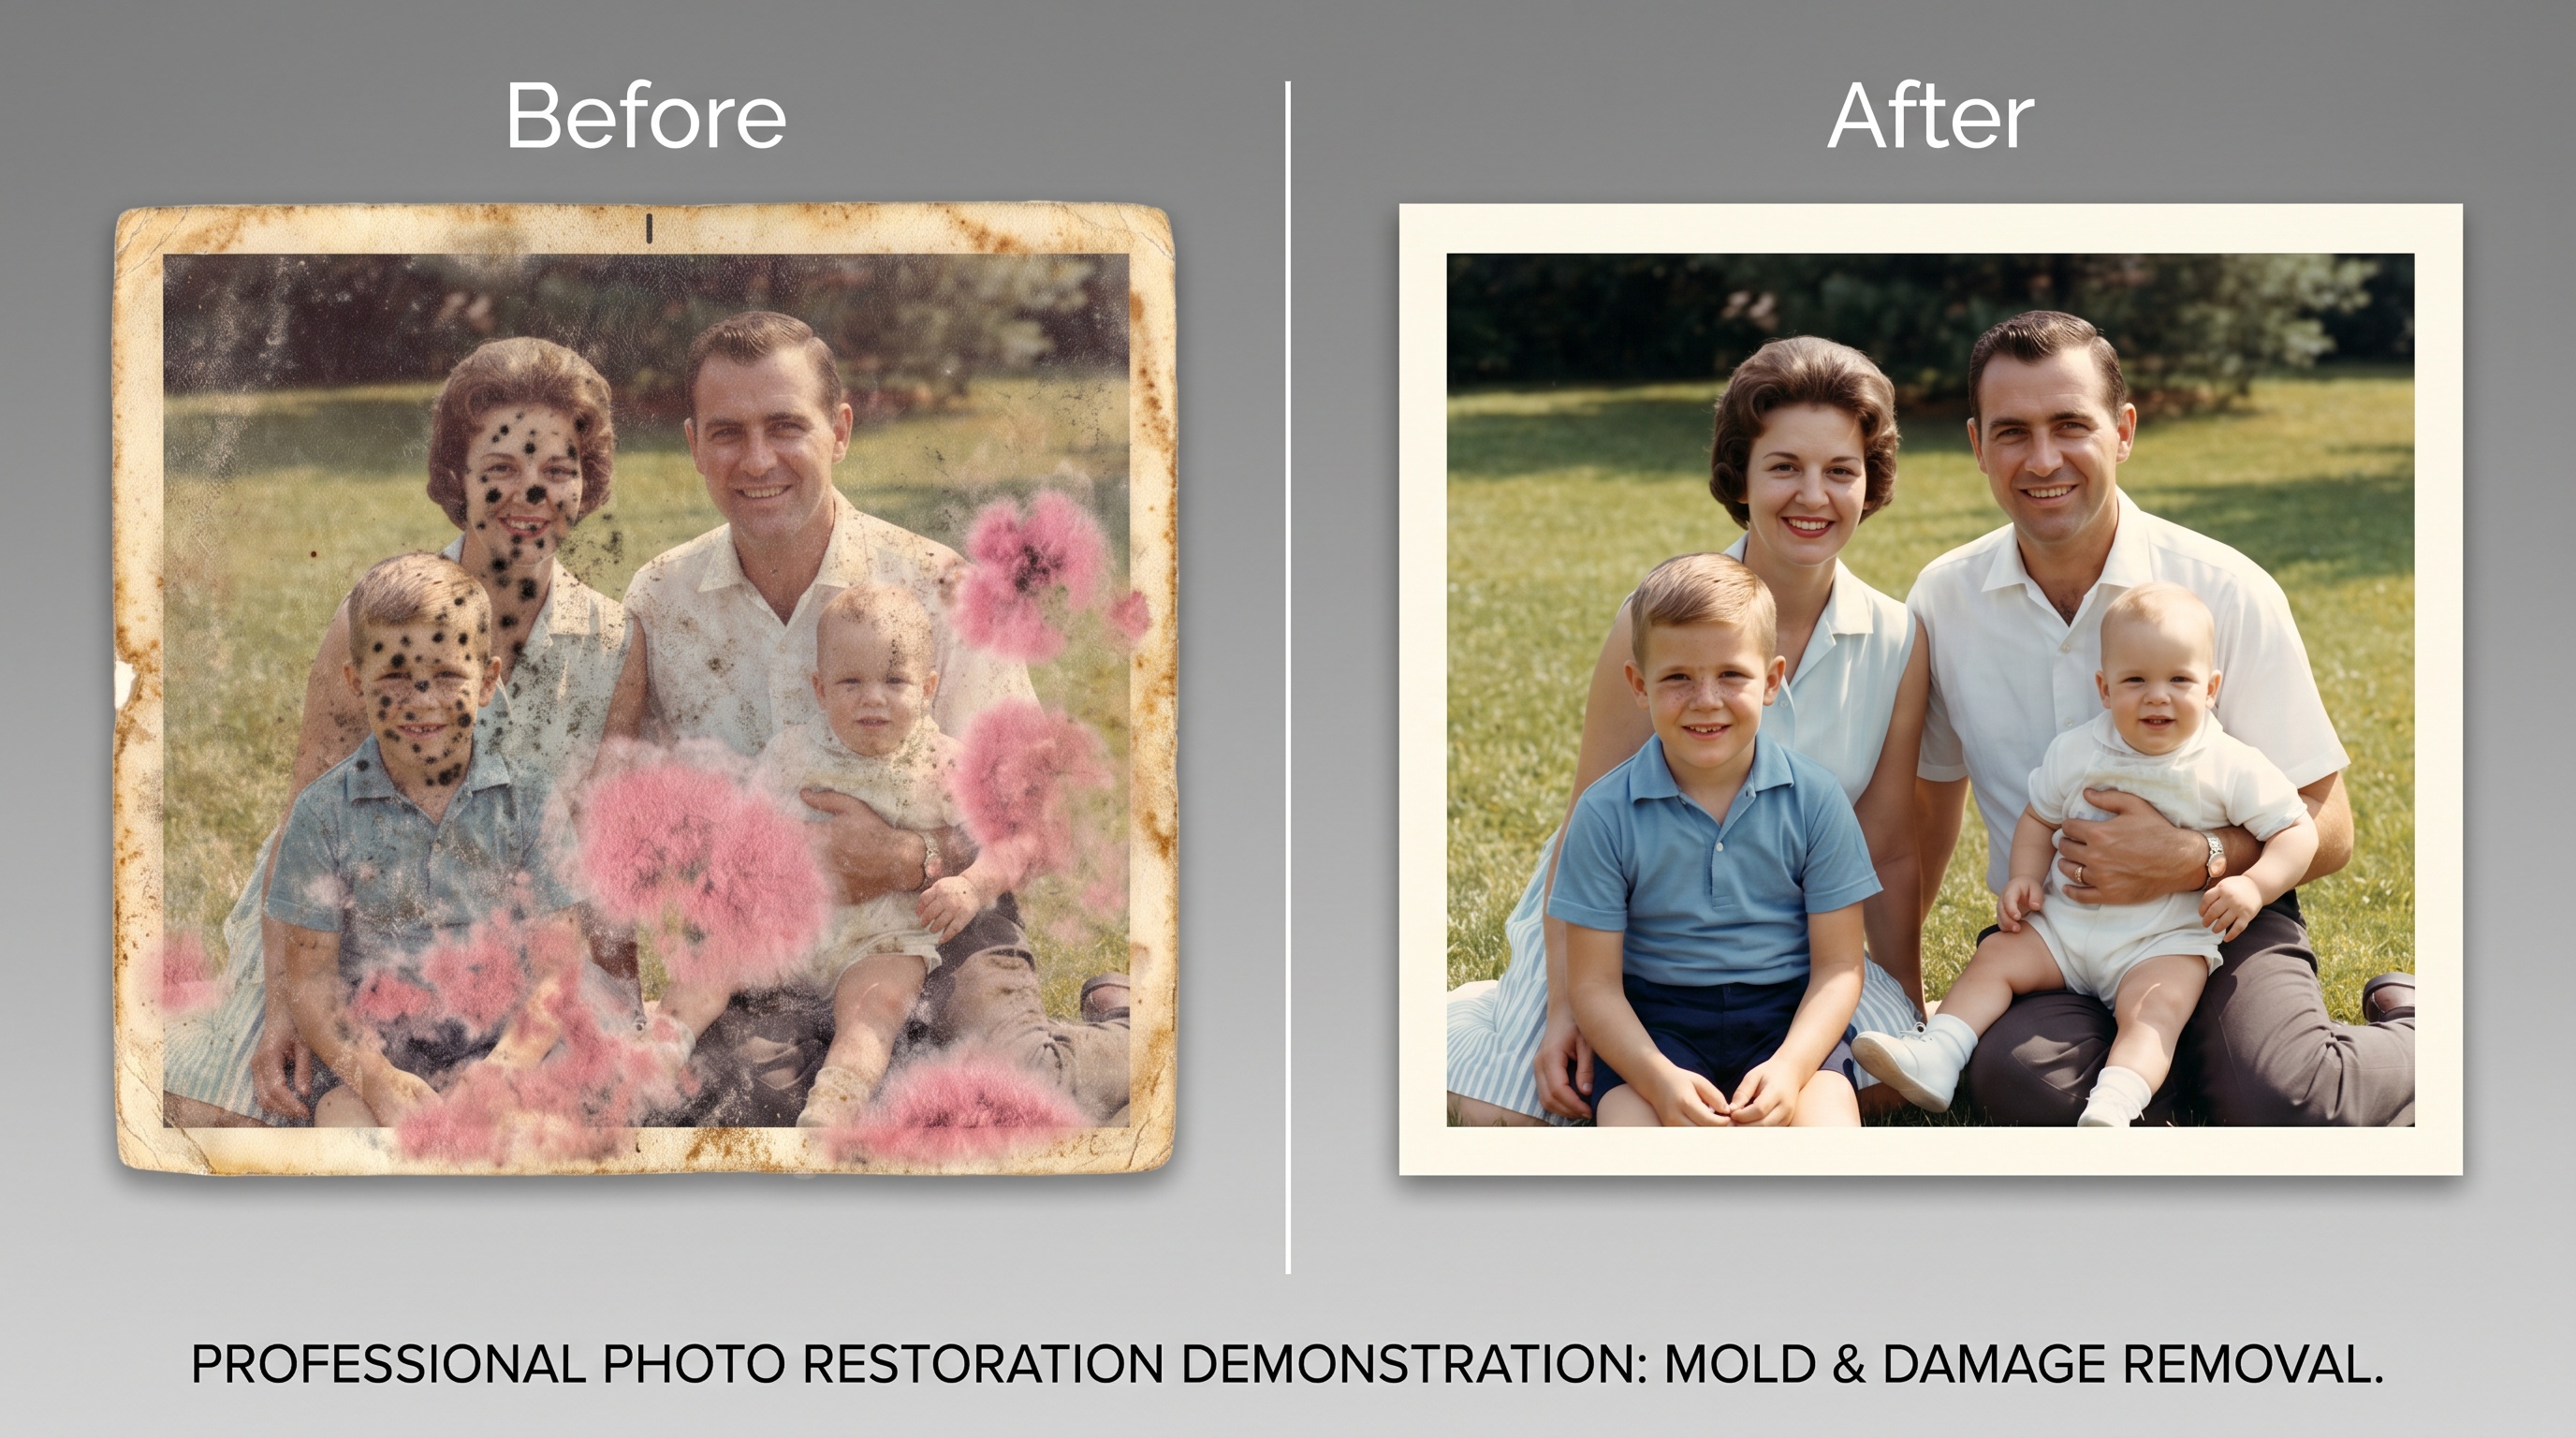
Where AI struggles: areas where the emulsion itself was destroyed. If mold ate a chunk out of someone's face, the model will reconstruct a face, but it's guessing. Run a few passes and keep the version that best matches other family photos of that person, ideally at a similar age.
When to Stop and Call a Conservator
You can DIY if
- • Photos are dry and mold is dormant (not fuzzy)
- • No photos are stuck together
- • You have proper safety gear and outdoor space
- • You're generally healthy, no respiratory issues
- • The photo has sentimental value, not monetary
Hire a pro if
- • Photos are fused together
- • You can see active fuzzy mold growth
- • Emulsion is tacky or lifting
- • The photo is a tintype, daguerreotype, or ambrotype
- • You're immunocompromised or asthmatic
- • The photo is historically significant or monetarily valuable
Professional photo conservators typically charge $75–$400 per photo depending on damage. The American Institute for Conservation maintains a directory of accredited professionals. Look for "photographic materials" specialization.
Pro tips
- • Scan before cleaning if the photo is fragile. Even a moldy scan is better than a destroyed original.
- • Work one photo at a time — contamination spreads.
- • Store cleaned photos separately in acid-free sleeves, in a dry closet, never a basement or attic.
- • Photograph the damage first if this is for insurance (flood or fire claims).
- • Dispose of contaminated materials — brushes, gloves, parchment — in a sealed bag. Don't reuse.
Cleaned and scanned? Now bring it back.
You've done the hard part. Upload the scan and let the AI handle the staining, pitting, and color shifts. Free, no sign-up, results in about 30 seconds.
Frequently asked questions
Is it safe to handle moldy photos at home?
Only with proper protection. N95 or P100 respirator, nitrile gloves, safety goggles, and outdoor ventilation. People with asthma, allergies, or compromised immune systems should not handle moldy material at all — send the photos to a conservator.
Should I wipe the mold off with a wet cloth?
Never. Wiping grinds the mold and its pigments into the gelatin emulsion permanently. Dry the photos first, then lift dormant mold with a soft natural-hair brush, working outdoors.
Can AI really fix moldy photos?
For most residual staining, pink pigment shifts, and black spots that remain after physical cleaning — yes. AI cannot rebuild areas where the emulsion has been eaten away; that detail is physically gone. It will reconstruct something plausible, which may or may not match reality.
What if my photos are soaking wet from a flood?
Seal them in plastic bags separated by wax paper and freeze them within 48 hours. Freezing halts mold growth and buys you time. This is the National Archives flood-recovery protocol.
Do I need to throw out the original after I scan it?
Not necessarily. Cleaned, dry photos in acid-free sleeves in a cool dry closet can last decades more. Do throw out brushes, gloves, and anything porous that contacted active mold.
Ready to Transform Your Photos?
Join thousands of users creating amazing AI-generated photos with BestPhoto